The simple pleasure of homemade ice cream transcends mere dessert; it’s a journey through culinary history and a testament to human ingenuity. While pinpointing the exact origin is tricky, ice cream’s ancient roots can be traced back to 2000 BC China, where emperors enjoyed a frozen dessert made from snow and ice mixed with fruit and honey. This early form, far removed from the creamy concoctions we know today, laid the groundwork for centuries of innovation. The concept gradually spread, with variations appearing in the Middle East and Persia, often incorporating ingredients like rosewater and cardamom.
The arrival of ice cream in Europe during the 16th century marked a significant turning point. Initially a luxury enjoyed by the elite, its popularity steadily increased. Italian chefs, particularly, played a vital role in refining the recipe, incorporating cream and eggs to create a richer, smoother texture. Catherine de’ Medici, upon marrying King Henry II of France, is credited with introducing ice cream to the French court. From there, it gradually spread throughout Europe, becoming increasingly accessible to the wider population. By the 19th century, commercial ice cream production began to flourish, leading to the widespread availability we see today. Yet, despite advances in technology, the appeal of homemade ice cream endures.
Homemade ice cream holds a unique cultural significance, often associated with family gatherings, summer celebrations, and cherished memories. It’s a food that fosters connection and creativity; the endless possibilities in terms of flavors and add-ins make it a truly personalized treat. A quick search online reveals millions of recipes, highlighting its universal appeal and adaptability. In the United States alone, the ice cream industry generates billions of dollars annually, with a significant portion of that coming from the sale of homemade ingredients like ice cream makers and specialty flavorings. This statistic underscores not only the enduring popularity of ice cream but also the continued passion for creating it at home.
This exploration of Best Homemade Ice Cream isn’t just about a recipe; it’s about understanding the rich history and cultural impact of this beloved dessert. It’s about rediscovering the joy of creating something delicious from scratch, a process that connects us to culinary traditions spanning millennia. From the emperors of ancient China to modern-day home cooks, the love for ice cream remains a constant, a testament to its timeless appeal. And in the following pages, we’ll unlock the secrets to crafting the perfect, personalized scoop.
Ingredients and Measurements
Creating the best homemade ice cream hinges on using high-quality ingredients and precise measurements. While you can certainly adapt recipes to your taste, paying close attention to these details will significantly impact the final texture and flavor of your ice cream.
Cream: The foundation of rich and creamy ice cream is heavy cream. We’ll be using 2 cups (475ml) of heavy cream (at least 36% milkfat). Using a lower fat content will result in a thinner, icier final product. Ensure your cream is very cold before you begin the process; this helps with achieving a smoother texture. Don’t substitute with half-and-half or whole milk; the lower fat content won’t provide the necessary richness and structure.
Milk: Adding milk to the cream provides balance and helps prevent the ice cream from becoming too rich and heavy. We’ll use 1 cup (240ml) of whole milk. Again, cold milk is key for optimal results. Avoid using ultra-pasteurized milk as it can sometimes impact the texture negatively.
Sugar: Granulated sugar is the sweetener of choice here. We’ll use 3/4 cup (150g) of granulated sugar. This amount provides a good balance of sweetness without being overpowering. Adjust this amount according to your preference and the sweetness of any added ingredients, such as fruit or chocolate.
Sweetener Alternatives (Optional): For those seeking a healthier or different flavor profile, consider using alternative sweeteners such as honey (about 2/3 cup, adjust to taste) or maple syrup (about 2/3 cup, adjust to taste). Keep in mind that these will alter the final flavor and may require slight adjustments to the overall recipe.
Flavorings: This is where you can truly personalize your ice cream! The possibilities are endless. For this base recipe we’ll focus on vanilla. Use 1 teaspoon of pure vanilla extract. Avoid using imitation vanilla as it will significantly impact the flavor quality. For other flavors, consider the following: chocolate chips (1/2 cup), fresh berries (1 cup, mashed), cocoa powder (2 tablespoons), or any other ingredient that appeals to your palate. Remember to adjust quantities based on your preferred intensity of flavor.
Important Note on Measurements: Using a kitchen scale for weighing ingredients, especially sugar, is highly recommended for the most accurate results. Volume measurements can vary depending on how ingredients are packed. Weighing ensures consistency and helps you achieve the perfect texture every time.
Egg Yolks (Optional): For a richer, custard-based ice cream, you can incorporate 2 large egg yolks. This will add a luxurious creaminess and depth of flavor. If using egg yolks, temper them carefully to prevent scrambling. Slowly whisk a small amount of the warm cream mixture into the yolks before adding the yolks to the main mixture.
Following these guidelines and using high-quality ingredients will help you achieve the best possible results when making your homemade ice cream. Remember to always taste and adjust as needed to personalize your recipe.
Equipment List
Making the best homemade ice cream requires the right tools. While some ingredients can be substituted, the equipment plays a crucial role in achieving the perfect creamy texture and preventing ice crystals. Here’s a detailed list of what you’ll need, categorized for clarity.
I. For Churning:
The heart of your homemade ice cream operation is the ice cream maker itself. There are several types available, each with its own pros and cons. Consider your needs and budget when making your choice.
- Electric Ice Cream Maker (Recommended): These machines automatically churn the ice cream mixture, resulting in a smoother, less icy texture. They typically have a built-in freezer bowl that needs to be frozen for at least 24 hours before use. Capacity varies, ranging from 1.5 quarts to 2 gallons. Choose a size appropriate for your needs and the number of servings you typically make. Look for models with a powerful motor for optimal churning.
- Manual Ice Cream Maker: These require more manual labor, involving a hand crank to churn the mixture. They’re a great option for those wanting a more hands-on experience, but they require more effort and may not produce quite as smooth a result. These usually have a smaller capacity than electric models.
II. For Preparation:
Proper preparation is key to successful ice cream making. You’ll need accurate measuring tools and some essential kitchen equipment.
- Measuring Cups and Spoons: Precise measurements are crucial for achieving the desired consistency and flavor. A set of dry and liquid measuring cups (at least 1 cup, ½ cup, and ¼ cup) and a set of measuring spoons (1 tablespoon, 1 teaspoon, ½ teaspoon) are essential. Avoid using approximate measurements, especially when dealing with liquids like cream and milk.
- Mixing Bowls: You’ll need at least two mixing bowls of varying sizes. One large bowl (at least 4-quart capacity) for mixing the entire ice cream base, and a smaller bowl for whisking eggs (if using a custard-based recipe). Stainless steel or glass bowls are preferred.
- Whisk: A sturdy whisk is needed for properly incorporating ingredients, especially when incorporating eggs into a custard base. A balloon whisk is recommended for its efficiency.
- Rubber Spatula or Scraper: This is crucial for scraping down the sides of the bowl and ensuring all ingredients are well combined. A silicone spatula is ideal as it’s heat-resistant and easy to clean.
- Saucepan (for custard-based recipes): If your recipe calls for a cooked custard base, you’ll need a medium-sized saucepan (approximately 2-quart capacity) for gently heating the mixture on the stovetop. Always use low to medium heat to prevent scorching.
III. Optional but Helpful:
These items are not strictly necessary, but they can significantly improve the ice cream-making process.
- Kitchen Scale: For precise measurements, especially for recipes requiring specific weights of ingredients.
- Fine-mesh Sieve or Strainer: Helpful for straining out any lumps or unwanted particles from the ice cream base.
- Airtight Containers: For storing your homemade ice cream in the freezer to maintain its quality and prevent freezer burn.
Remember to always prioritize safety when using kitchen equipment. Ensure all electrical appliances are properly grounded and follow manufacturer instructions.
Preparation of Ingredients
The success of your homemade ice cream hinges significantly on the proper preparation of your ingredients. This involves more than just throwing everything into a bowl; meticulous attention to detail at this stage ensures a smoother, richer, and more flavorful final product. We’ll cover chopping, measuring, and pre-cooking techniques crucial for achieving the best results.
Chopping and Slicing: If your recipe calls for fruits, nuts, or chocolate chunks, proper chopping is essential. For fruits, aim for consistent sizes to ensure even freezing and distribution throughout the ice cream. Avoid excessively large pieces, as they can create icy patches or uneven texture. A good rule of thumb is to chop fruits into approximately ½-inch pieces. For nuts, chopping them coarsely adds textural interest; however, excessively fine chopping can lead to a pasty consistency. Similarly, chocolate should be chopped into small, roughly uniform pieces, not grated or powdered unless specifically instructed by the recipe.
Measuring Ingredients: Accuracy in measuring is paramount in ice cream making. Unlike some baking recipes, where slight variations may be tolerable, precise measurements are key to achieving the desired texture and consistency in ice cream. Use a kitchen scale for dry ingredients whenever possible, as this provides the most accurate measurement. For liquids, use a liquid measuring cup and ensure you read the measurement at eye level. Avoid using measuring cups that are overly full or overflowing, as this will lead to inaccurate measurements.
Pre-cooking: Many ice cream recipes benefit from pre-cooking certain ingredients. This not only enhances the flavor but also improves the overall texture and prevents ice crystal formation. For example, custard-based ice creams often involve cooking a mixture of cream, milk, sugar, and egg yolks on the stovetop. This cooking process thickens the mixture and creates a richer, creamier base. Ensure you cook the custard over medium-low heat, stirring constantly to prevent scorching. The mixture should reach a temperature of approximately 170°F (77°C), at which point it will coat the back of a spoon. Do not overheat, as this can cause the eggs to scramble. Allow the cooked custard to cool completely before churning to prevent ice crystal formation.
Pre-cooking Fruits: Some fruits, particularly those that are high in water content (like berries or peaches), benefit from a quick pre-cooking step. This process reduces the moisture content, preventing the ice cream from becoming icy and improving its texture. Simply simmer the fruit gently until slightly softened, then allow it to cool completely before incorporating it into your ice cream base. Avoid overcooking, as this can lead to a mushy texture.
Infusing Flavors: If you’re using spices or extracts, consider infusing them into the cream or milk base before cooking. This allows the flavors to meld together, creating a more integrated and complex flavor profile. For example, you can infuse cream with vanilla beans by splitting the beans, scraping out the seeds, and simmering them in the cream for about 30 minutes. Strain the cream before using to remove the vanilla bean pods.
Chilling: Once your ingredients are prepared, it’s crucial to chill the mixture thoroughly before churning. This is essential for preventing large ice crystals from forming and achieving a smooth, creamy texture. Chill the mixture for at least 4 hours, or preferably overnight, in the refrigerator before churning. This allows the fat molecules to solidify, resulting in a smoother final product.
Churning the Ice Cream
Churning your homemade ice cream is the final, and arguably most exciting, step in the process. Getting this right ensures a smooth, creamy texture and prevents ice crystals from forming, resulting in a truly delicious final product. This section details the process, offering tips for success regardless of whether you’re using an ice cream maker or employing a more hands-on method.
Using an Ice Cream Maker: Most modern ice cream makers require a period of freezing before use. Consult your machine’s instructions carefully; this often involves freezing the bowl for at least 12 hours, sometimes even longer. Once frozen solid, carefully remove the bowl and attach it to the machine according to the manufacturer’s directions. Never force the bowl; gentle pressure is all that’s needed.
Pour your prepared ice cream base into the chilled bowl, ensuring not to overfill. The recommended fill line is usually indicated on the bowl itself. Typically, this is around 1.5 to 2 quarts (1.4 to 1.9 liters) for standard-sized machines. Avoid adding too much; an overfilled bowl can hinder the churning process and result in a less-than-ideal consistency.
Turn on your ice cream maker and let it churn according to the manufacturer’s instructions. Churning times usually range from 20 to 45 minutes, depending on the machine and the recipe. During this time, the mixture will thicken and increase in volume. Do not open the lid during churning unless your machine specifically allows it; this can introduce air and disrupt the process.
Once the churning cycle is complete, your ice cream will have a soft-serve consistency. Depending on your recipe and desired firmness, you may need to further harden the ice cream. For a firmer texture, transfer the ice cream to an airtight container and freeze it for at least 2-4 hours, or even overnight. This allows the ice crystals to fully set.
Without an Ice Cream Maker (No-Churn Method): While an ice cream maker simplifies the process, delicious ice cream can be made without one. These methods typically rely on whipping the ice cream base with heavy cream to incorporate air and then freezing it in stages. The key here is to prevent large ice crystals from forming. This often involves stirring the mixture every 30-60 minutes during the freezing process to break up any forming ice crystals. This needs to be repeated for several hours until the ice cream reaches the desired consistency.
Regardless of your method, remember these crucial points: Use high-quality ingredients, especially fresh cream and milk. Ensure your ice cream base is completely chilled before churning to optimize the freezing process. And finally, be patient! Allowing sufficient time for churning and freezing will yield the best results. Experiment with different flavors and techniques to discover your perfect homemade ice cream recipe.
Troubleshooting: If your ice cream is icy, you may have not churned it long enough or the base wasn’t cold enough before churning. If it’s too soft, it needs more time in the freezer. If it’s grainy, it’s likely due to using insufficient fat in the base or not stirring it frequently enough (in the no-churn method).
Freezing and Hardening
Freezing your homemade ice cream correctly is crucial for achieving the perfect texture and preventing ice crystals. The process involves two main stages: initial freezing and subsequent hardening. Getting both right will yield a creamy, delightful result.
Initial Freezing: This step aims to rapidly cool the ice cream base, minimizing the formation of large ice crystals. Avoid simply pouring your mixture into a container and placing it directly in the freezer. This slow, uneven freezing leads to a coarse, icy texture. Instead, use a shallow, wide container – a metal one works best as it conducts cold efficiently. A 9×13 inch baking dish or a similar sized container is ideal for smaller batches. Aim for a layer no more than 2 inches deep. This maximizes surface area for faster freezing.
Once your ice cream base is in the container, cover it tightly with plastic wrap, pressing it directly onto the surface of the mixture to prevent the formation of ice crystals on the top. This also minimizes freezer burn. Then, place the container in the coldest part of your freezer. Ideally, the freezer should be set to 0°F (-18°C) for optimal results. Allow the ice cream to freeze for at least 2-3 hours, or until it’s mostly frozen around the edges but still slightly soft in the center.
Hardening: After the initial freezing period, the ice cream needs to harden completely. At this stage, transferring the partially frozen ice cream to a more airtight container is recommended. An airtight container prevents freezer burn and helps maintain the ice cream’s moisture and flavor. Use a high-quality, freezer-safe container with a tight-fitting lid. Plastic containers are generally a good option.
Once transferred, return the ice cream to the freezer. This time, the hardening process can take anywhere from 4 to 6 hours, or even overnight, depending on your freezer’s temperature and the size of your container. Resist the urge to repeatedly open the freezer door during this time, as temperature fluctuations can disrupt the freezing process and lead to a less smooth texture.
Important Considerations:
- Temperature Consistency: A consistently cold freezer is paramount. If your freezer fluctuates in temperature, your ice cream will be more prone to ice crystal formation.
- Avoid Over-Freezing: While thorough freezing is important, over-freezing can lead to a rock-hard texture that’s difficult to scoop. Aim for a consistency that’s firm but still scoopable.
- Proper Storage: Once hardened, keep your ice cream stored in the coldest part of your freezer for optimal quality and longevity. Ideally, consume within 2-3 weeks for best flavor and texture.
By following these steps and paying attention to the details, you can ensure your homemade ice cream achieves its full potential – a creamy, delicious treat that rivals any store-bought version!
Serving Suggestions
Your freshly made ice cream is best enjoyed immediately for optimal texture and flavor. However, proper storage and serving techniques can enhance the overall experience. Let’s explore some delightful ways to savor your homemade masterpiece.
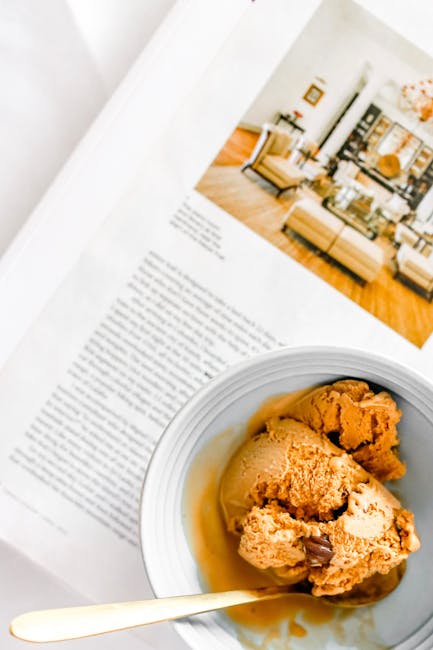
Classic Scoops: The simplest and most satisfying way to enjoy your ice cream is with a good old-fashioned scoop. We recommend using a high-quality ice cream scoop, preferably one with a trigger release. This prevents the ice cream from sticking and allows for clean, even scoops. Aim for approximately 2-3 scoops (about 1/2 cup to ¾ cup) per serving, depending on the size of your bowl and the richness of the ice cream. Consider using chilled bowls to slow down the melting process and keep your ice cream colder for longer.
Sundae Sensations: Elevate your ice cream experience with a classic sundae. Start with 2-3 scoops of your favorite flavor in a chilled bowl or glass. Then, get creative! A drizzle of your favorite hot fudge (about 2 tablespoons) or caramel sauce (about 1.5 tablespoons) adds a decadent touch. Top with a generous helping of whipped cream (approximately 2 tablespoons), a sprinkle of chopped nuts (about 1 tablespoon), and a cherry on top. Consider adding other toppings like sprinkles, chocolate shavings, or even cookie crumbles based on your preference and the ice cream flavor.
Ice Cream Sandwiches: For a fun and portable treat, create delicious ice cream sandwiches. Use two freshly baked cookies (chocolate chip, oatmeal raisin, or your favorite kind) and place approximately 1/4 cup of softened ice cream between them. Gently press the cookies together, ensuring even distribution. You can wrap them individually in parchment paper and freeze them for later, but they are best enjoyed fresh.
Creative Cones: Waffle cones or sugar cones add a delightful crunch and visual appeal. Fill a cone with 2-3 scoops of ice cream, ensuring it’s not overflowing. You can add toppings directly to the cone or serve them on the side for a more controlled experience. Avoid overfilling the cone to prevent spills and mess.
Beyond the Basics: Don’t be afraid to experiment! Consider adding your ice cream to milkshakes, smoothies, or even baked goods like brownies or cakes. Its versatility allows for endless culinary possibilities. A swirl of ice cream in coffee or hot chocolate creates a delightful contrast in temperature and texture. Remember to let slightly softened ice cream come to room temperature for a few minutes before incorporating it into other recipes to ensure smooth mixing.
Storage and Serving Temperature: For optimal flavor and texture, store your homemade ice cream in an airtight container in the freezer. Allow the ice cream to soften slightly (approximately 10-15 minutes) at room temperature before scooping. This will prevent breakage and make scooping much easier. Never leave ice cream out at room temperature for extended periods, as it can melt and become watery.
Presentation Matters: Take pride in your creations! Use attractive bowls, glasses, and toppings to elevate the presentation. A simple garnish can make even the simplest scoop look extraordinary. Enjoy your delicious, homemade ice cream!
Best Homemade Ice Cream: Recommendations
Serving Suggestions: To fully appreciate the creamy texture and rich flavor of your homemade ice cream, consider these serving suggestions. For a classic presentation, scoop generous portions into chilled bowls. You can elevate the experience with a sprinkle of chopped nuts (like pecans or walnuts), a drizzle of your favorite sauce (chocolate, caramel, or strawberry are all excellent choices), or a few fresh berries for a burst of contrasting sweetness and acidity. Consider using different sized scoops to create visually appealing servings. For a more sophisticated touch, serve your ice cream in elegant dessert glasses or even small, stemmed coupes.
Storage Conditions: Proper storage is crucial for maintaining the quality and preventing ice crystals from forming in your homemade ice cream. Always store your ice cream in an airtight container to minimize freezer burn and maintain its optimal texture. Ensure the container is completely sealed to prevent absorption of freezer odors. Ideally, use a shallow, wide container to facilitate faster freezing and even temperature distribution. Store your ice cream in the coldest part of your freezer, away from the door, where temperature fluctuations are less pronounced. For optimal freshness, consume your ice cream within two weeks. While it might technically last longer, the quality and texture will begin to degrade after this period.
Complementary Dishes: Homemade ice cream is incredibly versatile and pairs beautifully with a wide variety of dishes. It’s the perfect ending to a summer barbecue, complementing grilled meats and fresh salads. For a truly decadent experience, serve it alongside warm, gooey brownies or a slice of rich chocolate cake. The coolness of the ice cream provides a delightful contrast to the warmth of the dessert. A scoop of vanilla ice cream can also elevate simple desserts like apple pie or fruit crumble. Consider using your ice cream as a component in other recipes, such as ice cream floats, milkshakes, or even as a filling for baked goods.
Nutritional Information (per 1/2 cup serving – values will vary depending on recipe): This information is approximate and depends heavily on the specific ingredients used in your recipe. Always consult your recipe for precise nutritional information. A typical serving of homemade ice cream might contain approximately 200-300 calories, 10-15 grams of fat, 20-30 grams of sugar, and 2-4 grams of protein. The fat content will vary significantly depending on the type of milk or cream used, as well as the addition of ingredients such as nuts or chocolate chips. Sugar content will also vary based on the amount of sweetener used in your recipe. Remember to adjust your serving size accordingly to manage your calorie and sugar intake.
Important Note: These recommendations are guidelines; feel free to experiment with different serving styles, storage techniques, and complementary dishes to create your own unique ice cream experience. The key is to enjoy your delicious homemade creation!