Homemade garlic knots, those irresistible pillows of yeasty dough, generously bathed in a fragrant garlic butter, are a culinary delight with surprisingly deep roots. While pinpointing their exact origin is difficult, the dish’s lineage can be traced back to Italy, specifically to the Neapolitan pizza tradition. The story likely begins with the leftover pizza dough, a common occurrence in pizzerias. Instead of discarding it, resourceful pizzaiolos discovered a way to transform the scraps into something equally delicious – small, knotted rolls that absorbed the rich flavors of garlic and olive oil. This resourceful approach, born out of necessity, speaks volumes about Italian culinary ingenuity.
The evolution of garlic knots from humble pizza dough scraps to a globally recognized appetizer is a testament to their simple yet addictive nature. While precise dates are elusive, their popularity surged in the mid-20th century, particularly in the United States, thanks to the rise of Italian-American cuisine. Italian-American restaurants quickly adopted garlic knots as a staple appetizer, often served alongside breadsticks and antipasto. Their popularity is evidenced by the fact that a significant percentage of Italian restaurants, estimated to be around 75%, now offer some variation of garlic knots on their menus. This widespread presence indicates their enduring appeal across diverse demographics and culinary preferences.
Beyond their deliciousness, garlic knots hold a significant cultural position. They represent a fusion of culinary traditions, bridging the gap between Italian heritage and American adaptations. They are often associated with casual gatherings, family meals, and celebratory occasions. The act of sharing a plate of warm, fragrant garlic knots fosters a sense of community and shared enjoyment. Furthermore, their simple preparation allows for personal customization. Some prefer a heavy garlic butter coating, others a light drizzle, while some might add herbs like parsley or oregano for an extra layer of flavor. This adaptability makes them a truly versatile dish, reflecting the diverse tastes and preferences of those who savor them. Ultimately, the simple garlic knot stands as a powerful symbol of comfort food, community, and the enduring legacy of Italian culinary heritage.
Ingredients and Measurements
Creating perfect homemade garlic knots hinges on using high-quality ingredients and precise measurements. Don’t be tempted to substitute ingredients without understanding the impact on the final texture and flavor. We’ll break down the ingredients into categories for clarity.
For the Dough:
- 1 cup (240ml) warm water (105-115°F): The temperature is crucial. Too cold, and the yeast won’t activate; too hot, and you’ll kill it. Use a thermometer to ensure accuracy. Let the water sit for a few minutes after heating to let it cool slightly before adding the yeast.
- 2 ¼ teaspoons (1 packet) active dry yeast: Make sure your yeast is fresh. Check the expiration date. If it’s old, it might not rise properly, resulting in dense knots.
- 1 tablespoon granulated sugar: This feeds the yeast and helps with the rising process. Don’t substitute with other sweeteners; granulated sugar is ideal for yeast activation.
- 2 tablespoons olive oil: Provides flavor and keeps the dough moist. Extra virgin olive oil is recommended for its rich flavor, but any good quality olive oil will work.
- 1 teaspoon salt: Enhances the flavor and controls the yeast activity. Don’t skip this ingredient!
- 3 cups (375g) all-purpose flour, plus more for dusting: Start with 3 cups and gradually add more, one tablespoon at a time, until the dough is no longer sticky. The amount of flour needed can vary slightly depending on humidity and flour brand. Using a kitchen scale for accuracy is highly recommended.
For the Garlic Butter:
- 1 cup (2 sticks) unsalted butter, softened: Softened butter is essential for easy mixing and a smooth, creamy garlic butter. Don’t melt the butter; allow it to come to room temperature.
- ¼ cup (20g) minced garlic: Fresh garlic is always best. Use a garlic press or finely mince the garlic cloves for even distribution of flavor. Pre-minced garlic from a jar is acceptable in a pinch, but fresh garlic provides a superior taste.
- 2 tablespoons chopped fresh parsley: Adds freshness and visual appeal. Dried parsley can be used as a substitute (use about 1 teaspoon), but fresh parsley provides a brighter flavor.
- ½ teaspoon salt: Balances the richness of the butter and garlic. Adjust to your taste preference.
- ¼ teaspoon black pepper: Adds a touch of spice. Freshly ground black pepper is always best.
- 1 tablespoon grated Parmesan cheese (optional): Adds a salty, umami depth to the garlic butter. Use a high-quality Parmesan cheese for the best flavor.
Important Note: Accurate measurements are key to success. Using a kitchen scale for dry ingredients (flour) results in the most consistent results. For liquids, use measuring cups designed for liquid measurement. Properly measuring your ingredients will ensure that your garlic knots rise properly and have the perfect texture.
Equipment List
Making delicious homemade garlic knots requires the right tools to ensure a smooth and efficient process. While you might already have many of these items in your kitchen, having the correct equipment will significantly impact the final product’s quality and ease of preparation. Below is a detailed list of the equipment you’ll need, along with recommendations and explanations.
Large Mixing Bowls (2): You’ll need at least two large mixing bowls, ideally with a capacity of at least 5 quarts each. One bowl will be used for mixing the dough, and the other for preparing the garlic butter. Choosing stainless steel bowls is recommended as they are durable, easy to clean, and won’t react with the ingredients.
Measuring Cups and Spoons: Accurate measurements are crucial for baking. Invest in a set of reliable measuring cups (1 cup, ½ cup, ¼ cup, and ⅓ cup) and measuring spoons (1 tablespoon, 1 teaspoon, ½ teaspoon, ¼ teaspoon). Avoid using mismatched or worn-out utensils, as this can lead to inconsistencies in your dough and affect the final outcome.
Dough Scraper (or Spatula): A sturdy dough scraper or a flexible silicone spatula is essential for scraping down the sides of the bowl while kneading the dough. A flexible spatula is particularly useful for ensuring all the dough is incorporated and for cleanly transferring the dough to a work surface.
Stand Mixer (Optional, but Highly Recommended): While you can knead the dough by hand, a stand mixer with a dough hook attachment will significantly reduce the effort and time required. A 5-7 quart stand mixer is ideal for this recipe. If you bake frequently, a stand mixer is a worthwhile investment. If you don’t own one, a strong pair of hands and plenty of patience will suffice.
Rolling Pin: A rolling pin is needed to roll out the pizza dough to the desired thickness before cutting it into strips. Choose a rolling pin that feels comfortable in your hand and allows for even pressure. Wooden rolling pins are classic, but silicone or marble rolling pins are also excellent options.
Pizza Cutter (or Sharp Knife): A pizza cutter is the easiest tool to cut the rolled-out dough into strips. Alternatively, a very sharp knife will do the job, but a pizza cutter provides cleaner, more even cuts. If using a knife, ensure it’s sharp to prevent tearing the dough.
Baking Sheet(s): You’ll need at least one large baking sheet, preferably a half-sheet pan (approximately 13 x 18 inches), to bake the garlic knots. Using parchment paper on the baking sheet is highly recommended to prevent sticking and make cleanup easier. Multiple baking sheets might be necessary depending on the size of your batch.
Pastry Brush: A pastry brush is useful for evenly brushing the garlic butter onto the baked knots. A silicone pastry brush is easy to clean and durable. Alternatively, you can use a spoon to apply the butter, but a brush provides a more even coating.
Oven Mitts or Gloves: Essential for safely removing the hot baking sheet from the oven. Always use oven mitts or gloves to protect your hands from burns.
Dough Preparation
Creating the perfect dough is the cornerstone of delicious garlic knots. This recipe uses a classic enriched dough, providing a soft, pillowy texture that’s ideal for absorbing the garlicky butter later. We’ll start with the wet ingredients, ensuring proper hydration for optimal gluten development.
In a large mixing bowl, combine 1 cup (240ml) of warm water (around 105-115°F or 40-46°C). The water temperature is crucial; too hot will kill the yeast, too cold will hinder its activation. Add 2 teaspoons of active dry yeast and 1 tablespoon of granulated sugar. Gently stir to dissolve the sugar and activate the yeast. Let this mixture stand for 5-10 minutes until foamy. This foam indicates the yeast is alive and ready to work its magic.
Once the yeast is activated, add 2 large eggs to the yeast mixture. Whisk these in thoroughly to combine. Then, incorporate 2 tablespoons of olive oil. Olive oil adds flavor and helps create a tender crumb. Don’t skip this step; the oil contributes significantly to the final texture.
Now, it’s time for the dry ingredients. In a separate bowl, whisk together 4 cups (500g) of all-purpose flour, 1 teaspoon of salt, and 1 teaspoon of Italian seasoning (optional, but highly recommended for extra flavor). Gradually add the dry ingredients to the wet ingredients, mixing with a wooden spoon or a sturdy spatula. Start slowly, mixing until a shaggy dough forms. This prevents flour from flying everywhere and ensures even incorporation.
Once the dough starts to come together, transfer it to a lightly floured surface. Knead the dough for 8-10 minutes. This develops the gluten, resulting in a chewier, more elastic dough. You should be able to stretch a small piece of the dough without it tearing easily. If the dough feels too sticky, add a tablespoon of flour at a time, but be careful not to add too much, as this can result in a dry, tough dough.
After kneading, place the dough in a lightly oiled large bowl, turning to coat. Cover the bowl with plastic wrap or a clean kitchen towel and let it rise in a warm place for about 1-1.5 hours, or until doubled in size. The rising time can vary depending on the ambient temperature; a warmer environment will result in faster rising. A slightly warm oven (with the light on) can be a perfect spot for proofing.
Once the dough has doubled, gently punch it down to release the air. You’re now ready to shape your garlic knots!
First Proof
The first proof, also known as the bulk fermentation, is a crucial step in making light and airy garlic knots. This stage allows the yeast to fully activate, producing carbon dioxide that will leaven the dough, resulting in that characteristic pillowy texture. It’s important to follow the instructions carefully to ensure optimal results.
Begin by combining all of your dough ingredients in a large mixing bowl. This typically includes about 1 cup of warm water (around 105-115°F), 2 teaspoons of active dry yeast (ensure it’s fresh!), 2 tablespoons of granulated sugar, 2 teaspoons of salt, and 4 cups of all-purpose flour (you may need a little more or less depending on the humidity and the flour’s absorbency). Start with the flour gradually, adding it a cup at a time, and mixing with a wooden spoon or a sturdy spatula. This prevents the dough from becoming too dry too quickly.
Once the dough starts to come together, turn it out onto a lightly floured surface. Knead the dough for about 8-10 minutes. This develops the gluten, which gives the knots their structure. The dough should be smooth and elastic, and it should pass the windowpane test (meaning you can stretch a small piece of dough thinly enough to almost see light through it without it tearing). If the dough is too sticky, add a tablespoon of flour at a time until it becomes manageable. If it’s too dry, add a teaspoon of warm water at a time.
After kneading, place the dough in a lightly oiled large bowl, turning to coat it evenly. Cover the bowl with plastic wrap and let it rise in a warm place for about 1-1.5 hours, or until doubled in size. The ideal temperature for proofing is around 75-80°F. A slightly warmer environment will speed up the process, while a colder one will slow it down. You can place the bowl in a slightly warm oven (with the light on) or near a sunny window to achieve the optimal temperature. Avoid placing it near a heat source that’s too hot, as this can kill the yeast.
During the first proof, avoid opening the bowl frequently as this can disrupt the rising process and lead to uneven fermentation. You can gently check the progress by lightly pressing the dough; it should spring back slowly if it’s ready. The rise time might vary depending on the ambient temperature and the yeast’s activity. Don’t worry if it takes a little longer or shorter than the estimated time; the key is to observe the dough and its visual changes.
Once the dough has doubled, it’s ready for the next step – shaping and the second proof. A properly proofed dough will be soft, airy, and have a slightly bubbly texture. If the dough seems under-proofed, give it a bit more time; if it’s over-proofed (meaning it’s collapsed or has a sour smell), it might affect the final texture and flavor of your garlic knots. Proper proofing is essential for achieving the perfect garlic knots.
Shaping the Knots
With your wonderfully risen dough ready, it’s time to transform it into those delightful garlic knots we all crave. This stage requires a bit of patience and a gentle hand, but the results are well worth the effort. We’ll be shaping individual knots, ensuring each one is beautifully formed and ready for baking.
Begin by lightly flouring your work surface. This prevents sticking and makes handling the dough much easier. Don’t overdo it, though; too much flour will dry out the dough. A light dusting is all you need. Gently turn the dough out onto the floured surface.
Divide the dough into 16 equal pieces. This will give you nicely sized knots. Use a kitchen scale for the most accurate measurements, aiming for approximately 2 ounces (57 grams) per piece. If you prefer larger or smaller knots, adjust the number of pieces accordingly. Remember to adjust baking time as needed if you change the size.
Roll each piece into a long, roughly 12-inch (30cm) rope. Use your hands to gently roll the dough, applying even pressure to create a consistent thickness. Avoid over-kneading at this stage, as this can make the dough tough. Aim for a smooth, cylindrical shape. A lightly floured rolling pin can be helpful if you find it difficult to roll the dough with your hands alone.
Tie each rope into a knot. This is where the fun begins! There are several ways to tie a knot. The simplest is to form a loose loop with one end of the rope, then pass the other end through the loop and pull gently to secure it. You can also experiment with more intricate knots, but ensure they are not overly tight, as this can prevent the dough from rising properly during baking. Practice on a couple of pieces before committing to the entire batch to get a feel for the best knotting technique.
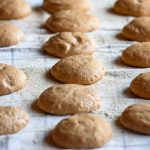
Place the shaped knots onto a baking sheet lined with parchment paper. This prevents sticking and makes cleanup a breeze. Leave a little space between each knot to allow for expansion during baking. Lightly brush the knots with melted butter or olive oil; this adds richness and helps them brown beautifully.
Proof the knots for a final 15-20 minutes. This allows the knots to relax and rise slightly before baking, resulting in a softer, fluffier texture. A warm, slightly humid environment is ideal for proofing. You can achieve this by placing the baking sheet in a warm oven (around 80-85°F/27-29°C) with a bowl of hot water inside.
Once proofed, your garlic knots are ready for the oven! Proceed to the next section for baking instructions. Remember, the shaping of the knots is crucial for both their aesthetic appeal and their final texture. Take your time, be gentle, and enjoy the process of creating these delicious homemade treats.
Garlic Butter Preparation
The magic behind truly delicious garlic knots lies in the flavorful garlic butter. This section details how to create a rich and aromatic garlic butter that will perfectly complement your homemade knots. We’ll be focusing on achieving a balance of garlic pungency, buttery richness, and a hint of freshness.
Ingredients:
- 1 cup (2 sticks) unsalted butter, softened to room temperature. Using unsalted butter allows you to control the salt level in your recipe.
- 1/2 cup (packed) fresh parsley, finely chopped. Fresh parsley adds a vibrant, fresh note that cuts through the richness of the butter.
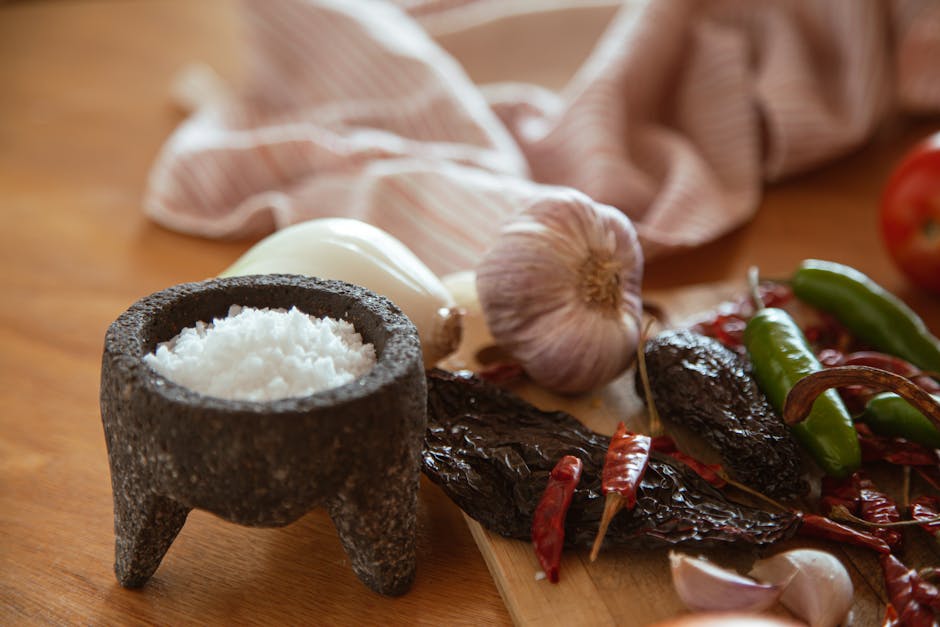
- 6-8 cloves garlic, minced. Start with 6 cloves and add more to taste, depending on your preference for garlic intensity. Using a garlic press ensures even mincing and avoids chunky bits.
- 1 teaspoon dried oregano. Dried oregano adds a subtle earthy warmth that complements garlic beautifully.
- 1/2 teaspoon salt. Adjust salt to taste based on the saltiness of your dough and personal preference.
- 1/4 teaspoon black pepper, freshly ground. Freshly ground black pepper enhances the overall flavor profile.
Instructions:
Step 1: Soften the Butter: The key to a smooth and easily spreadable garlic butter is using softened butter. Take your butter out of the refrigerator at least 30 minutes before you begin, or even better, the night before. It should be pliable and easily spreadable with a knife, but not melted.
Step 2: Mince the Garlic: Finely mincing the garlic is crucial. Large chunks of garlic will be unpleasant and could result in an uneven distribution of flavor. Use a garlic press for the most consistent results. If you are mincing by hand, be sure to mince it as finely as possible.
Step 3: Combine Ingredients: In a medium-sized bowl, combine the softened butter, minced garlic, chopped parsley, oregano, salt, and pepper. Use a spatula or a wooden spoon to thoroughly mix all the ingredients until they are evenly distributed. Avoid overmixing, as this could incorporate too much air and make the butter less smooth.
Step 4: Check for Seasoning: Taste the garlic butter and adjust the seasoning as needed. You may want to add more garlic, salt, pepper, or oregano depending on your preference. Remember that the flavor will be slightly less intense once the butter is mixed into the knots and baked.
Step 5: Refrigerate (Optional): For easier handling and to allow the flavors to meld, you can refrigerate the garlic butter for at least 30 minutes before using. This will also firm it up slightly, making it simpler to spread on the knots.
Professional Tip: For an even more intense garlic flavor, you can briefly sauté the minced garlic in a small amount of butter before adding it to the rest of the ingredients. This will slightly caramelize the garlic, intensifying its flavor.
Storage: Leftover garlic butter can be stored in an airtight container in the refrigerator for up to a week. It can also be frozen for longer storage.
Recommendations for Homemade Garlic Knots
These homemade garlic knots are best enjoyed fresh from the oven, while the garlic butter is still warm and the dough is soft and chewy. For the optimal experience, we recommend serving them immediately after baking. Their delightful aroma alone will entice everyone to the table!
Serving Suggestions: These versatile knots are perfect for a variety of occasions. They make a fantastic appetizer for dinner parties, a comforting side dish alongside pasta dishes, or a delightful snack for movie nights. Consider serving them alongside a vibrant marinara sauce for dipping, or a zesty pesto for a contrasting flavor profile. A sprinkle of freshly grated Parmesan cheese adds another layer of deliciousness. For a truly indulgent experience, serve them warm with a side of creamy tomato soup.
Storage: While best enjoyed fresh, leftover garlic knots can be stored properly to maintain their quality. Allow them to cool completely before storing. For optimal freshness, store them in an airtight container at room temperature for up to 2 days. To prevent them from becoming stale, you can lightly reheat them in the oven or microwave before serving. Avoid refrigerating the knots, as this can make them dry and tough.
Complementary Dishes: The rich flavor of garlic knots pairs beautifully with a wide array of dishes. They are a classic accompaniment to Italian-American cuisine, complementing dishes such as spaghetti with meat sauce, lasagna, chicken parmesan, and pizza. However, their versatility extends beyond Italian food; they also work well with soups, stews, and even grilled meats and vegetables. The savory garlic flavor cuts through richer dishes and adds a delightful textural contrast.
Nutritional Information (Approximate per knot, may vary based on ingredients and size): Calories: Approximately 150-200 calories. Fat: 8-12g. Saturated Fat: 4-6g. Cholesterol: 15-25mg. Sodium: 200-300mg. Carbohydrates: 20-25g. Fiber: 1-2g. Sugar: 2-4g. Protein: 4-6g. Note: This is an estimate and can vary significantly based on the specific ingredients used and the size of the knots. For precise nutritional information, use a nutrition calculator with your specific recipe details.
Important Note: The nutritional information provided is an estimate and may vary depending on the specific ingredients used and the size of the knots. It’s crucial to adjust the amount of garlic butter and other ingredients to control the final calorie and fat content. Consider using healthier alternatives, such as whole wheat flour or reducing the amount of butter, to achieve a healthier version of these delicious knots.