The British trifle, a seemingly simple yet gloriously decadent dessert, boasts a history as rich and layered as its ingredients. While pinning down a precise origin is difficult, its evolution is fascinating, reflecting changing culinary trends and societal shifts. Its emergence is likely tied to the increasing availability of readily-made ingredients and the rise of the middle class in the 18th and 19th centuries, allowing for more elaborate desserts to grace the dining tables of a broader population. Early recipes, often featuring variations on fruit, custard, and cake, highlight its adaptable nature, evolving from humble beginnings to a symbol of British culinary creativity.
Unlike many desserts with a traceable lineage to specific chefs or regions, the trifle’s development was more organic. It’s a testament to the improvisational spirit of home cooks, building upon existing techniques and readily available seasonal produce. Recipes varied widely throughout the British Isles, with regional preferences influencing the types of fruit used, the density of the custard, and the style of cake base. This adaptability contributed to its enduring popularity – it’s a dessert that can be tailored to suit individual tastes and the ingredients at hand, effectively becoming a blank canvas for culinary expression.
The trifle’s cultural significance is undeniable. It’s a staple at countless British celebrations, from garden parties and Christmas feasts to birthdays and weddings. Its layered construction, often visually stunning, makes it a centerpiece for gatherings, its appearance as much a part of the celebratory experience as its taste. While exact statistics on trifle consumption are hard to come by, its ubiquitous presence in British culture and the sheer volume of recipes available online and in cookbooks suggest its continued popularity. Surveys frequently rank it among the nation’s favorite desserts, and its image is deeply intertwined with notions of British hospitality and tradition.
Beyond its popularity in the UK, the trifle has enjoyed a global reach, inspiring variations and adaptations in other countries. While the classic British trifle maintains its core elements – sponge cake, custard, fruit, and jelly – international versions might incorporate local ingredients or flavors, demonstrating its remarkable versatility and enduring appeal. Ultimately, the delicious British trifle represents more than just a dessert; it’s a culinary emblem of British culture, a testament to its adaptable spirit, and a delicious treat enjoyed across generations.
Ingredients and Measurements
Creating a truly delicious British trifle relies heavily on the quality and precise measurement of your ingredients. Don’t be tempted to skimp on quality; the best results come from using fresh, high-quality produce.
For the sponge base, we’ll be using a classic Victoria sponge recipe. You can, of course, substitute with shop-bought sponge fingers or even pound cake if you’re short on time. However, a homemade sponge offers a superior flavour and texture. For this recipe, you will need:
- 175g (6 oz) self-raising flour: Use a good quality self-raising flour for the best rise. Sieving the flour before adding it to the mixture ensures a light and airy sponge.
- 175g (6 oz) caster sugar: Caster sugar dissolves easily and creates a lovely soft texture. Granulated sugar can be used as a substitute, but be sure to cream it well with the butter.
- 175g (6 oz) unsalted butter, softened: Softened butter is crucial for proper creaming. Make sure it’s at room temperature – this will create a smooth and light batter. Using unsalted butter allows you to control the salt level in your recipe.
- 3 large eggs: Free-range eggs are recommended for the best flavour. Ensure they are at room temperature for optimal emulsification with the butter and sugar.
- 1 teaspoon baking powder: This is essential for the sponge’s rise. Check the expiry date to ensure it’s still effective.
- 1-2 tablespoons milk: Add milk gradually to adjust the consistency of the batter. The batter should be smooth and pourable, but not too runny.
- 1 teaspoon vanilla extract (optional): This enhances the flavour of the sponge. A high-quality vanilla extract makes a noticeable difference.
For the custard, we’ll be making a classic vanilla custard. Ensure you use a good quality vanilla extract or vanilla pod for the best flavour.
- 500ml (1 pint) whole milk: Whole milk provides a richer, creamier custard. Semi-skimmed milk can be used but will result in a slightly thinner custard.
- 4 large egg yolks: Use only fresh egg yolks for the best results. Separate the yolks carefully to avoid any egg white contamination which can cause curdling.
- 75g (3 oz) caster sugar: This provides sweetness and helps to thicken the custard. Adjust to your personal preference.
- 2 tablespoons cornflour: This is crucial for thickening the custard. Ensure it is thoroughly mixed with a little of the cold milk before adding to the rest.
- 1 teaspoon vanilla extract: As mentioned before, a high-quality vanilla extract or a vanilla pod scraped into the custard will add a wonderful flavour.
Finally, for the fruit and topping, we have:
- 500g (1lb) strawberries, hulled and sliced: Fresh, ripe strawberries are essential for the best flavour and appearance. If strawberries are out of season, you can substitute with other berries like raspberries or blueberries.
- 200ml (7 fl oz) double cream: Double cream is essential for creating a rich and decadent topping. Lightly whip it to soft peaks for the best texture.
- 2 tablespoons icing sugar: Sweeten the whipped cream to your liking. Add gradually, tasting as you go.
Remember to adjust quantities based on the size of your trifle bowl and your personal preferences. Enjoy creating your delicious British trifle!
Equipment List
Creating a truly delicious British trifle requires not only excellent ingredients but also the right tools. This equipment list details everything you’ll need, from essential mixing bowls to serving dishes, ensuring a smooth and efficient trifle-making process. Careful attention to equipment selection can significantly impact the final presentation and overall success of your trifle.
Mixing Bowls: You’ll need at least three mixing bowls of varying sizes. A large bowl (approximately 5-quart capacity) is crucial for combining the custard and whipped cream, preventing spills and ensuring thorough mixing. A medium-sized bowl (approximately 3-quart capacity) is ideal for whipping the cream, while a smaller bowl (approximately 2-quart capacity) will be useful for preparing the jelly or other components. Opt for stainless steel or glass bowls for their durability and easy cleaning. Avoid using plastic bowls, especially for hot custard, as they can retain odors and warp with heat.
Whisk: A sturdy balloon whisk is essential for achieving smooth, lump-free custard and perfectly whipped cream. A good quality whisk with strong wires will incorporate air efficiently, resulting in a lighter texture. Consider purchasing a whisk with a comfortable ergonomic handle to minimize hand fatigue during the whipping process.
Measuring Cups and Spoons: Accurate measurements are paramount in baking and dessert making. Having a complete set of measuring cups (dry and liquid) and spoons will ensure consistent results. Use standardized measuring tools to avoid inconsistencies in your trifle. Invest in a set of high-quality measuring cups and spoons that are easy to read and clean.
Saucepan: A medium-sized saucepan (approximately 2-quart capacity) is required for cooking the custard. Choose a saucepan with a heavy base for even heat distribution to prevent scorching. A non-stick surface is also beneficial for easy cleaning, particularly if dealing with a custard that has thickened slightly.
Rubber Spatula/Scraper: A flexible rubber spatula or scraper is invaluable for scraping down the sides of bowls, ensuring all ingredients are incorporated. This tool is particularly helpful when making custard to prevent sticking and ensure a smooth consistency. A high-quality spatula will be durable and resistant to staining.
Sieve/Strainer: A fine-mesh sieve is useful for straining the custard to remove any lumps or skin that may have formed during cooking. This step isn’t always necessary, but it significantly improves the custard’s texture and smoothness. A fine-mesh sieve will ensure a perfectly smooth custard.
Serving Dish: A clear glass trifle bowl is the traditional and most visually appealing choice for presenting your trifle. The layers are beautifully showcased through the transparent glass. Select a trifle bowl with sufficient capacity to hold all the ingredients comfortably without overflowing. A trifle bowl with a pedestal adds an elegant touch.
Electric Mixer (Optional but Recommended): While a whisk can achieve excellent results, an electric hand mixer or stand mixer significantly reduces the effort required for whipping the cream and can create a lighter, airier texture. If you frequently bake or make desserts, an electric mixer is a valuable investment.
Preparation of the Sponge (Baking & Cooling)
The success of a truly delicious British trifle hinges on a light and moist sponge cake. This recipe uses a classic Victoria sponge method, easily adaptable to your preferred flavourings. We’ll be making two 8-inch round sponges.
Ingredients for the Sponge:
- 225g (8oz) unsalted butter, softened
- 225g (8oz) caster sugar
- 4 large eggs
- 225g (8oz) self-raising flour
- 1 tsp baking powder
- 2 tbsp milk
- 1 tsp vanilla extract (optional, but recommended)
Equipment: Two 8-inch round sandwich tins, greaseproof paper, electric mixer (handheld or stand), two wire racks.
Instructions:
Preheat your oven to 180°C (160°C fan/Gas Mark 4). This is crucial for even baking. Grease and line the bases of your two 8-inch sandwich tins with greaseproof paper. This prevents sticking and ensures easy removal.
In a large bowl, cream together the softened butter and caster sugar using an electric mixer until the mixture is light, fluffy and pale in colour. This step is vital for a light and airy sponge. Take your time and beat for at least 5 minutes. The mixture should increase in volume significantly.
Next, crack in the eggs one at a time, beating well after each addition. Ensure each egg is fully incorporated before adding the next. If the mixture begins to curdle, add a spoonful of the flour and beat until smooth before continuing with the remaining eggs. This helps to stabilise the mixture.
In a separate bowl, sift together the self-raising flour and baking powder. Gradually add this to the butter and egg mixture, folding it in gently with a large metal spoon or spatula. Avoid overmixing at this stage, as this can lead to a tough sponge. The mixture should be smooth and just combined.
Gently stir in the milk and vanilla extract (if using). Divide the batter evenly between the two prepared tins.
Bake for 20-25 minutes, or until a skewer inserted into the centre comes out clean. Check the sponges after 20 minutes; ovens vary, so keep a close eye on them.
Once baked, carefully remove the sponges from the oven and leave them to cool in the tins for 10 minutes before turning them out onto the wire racks to cool completely. Allowing them to cool completely prevents the sponge from becoming soggy when layered in the trifle.
Once completely cool, you can level the tops of the sponges with a serrated knife if necessary, to ensure a neat and even trifle. Your perfectly baked sponges are now ready to be layered with your delicious trifle fillings!
Making the Custard
The custard is the creamy heart of a classic British trifle, and getting it just right is key to a truly delicious dessert. This recipe uses a traditional method, resulting in a smooth, velvety custard with a gorgeous vanilla flavour. We’ll be making a vanilla custard, but feel free to experiment with other extracts like lemon or almond for a twist.
Ingredients:
- 500ml whole milk – Using whole milk is crucial for a rich and creamy custard. Skimmed milk will result in a thinner, less satisfying texture.
- 100g caster sugar – Adjust to your preference for sweetness. You can use granulated sugar, but caster sugar dissolves more easily.
- 4 large egg yolks – Ensure your eggs are fresh for the best results. Older eggs may not thicken the custard properly.
- 2 tbsp cornflour (cornstarch) – This helps to thicken the custard and give it a smooth consistency. Don’t substitute with flour; the result will be grainy.
- 1 tsp vanilla extract – Use a good quality vanilla extract for the best flavour.
- Pinch of salt – This enhances the other flavours.
Method:
1. Begin by gently warming the milk in a medium saucepan over medium heat. Do not boil the milk; you want it to be warm, not scalding. A temperature around 70-80°C (160-175°F) is ideal. You can test this by dipping your finger in – it should be comfortably warm, not hot.
2. In a separate bowl, whisk together the egg yolks, caster sugar, cornflour, vanilla extract, and salt until pale and creamy. Whisk vigorously to ensure there are no lumps of cornflour. This step is essential for a smooth custard.
3. Slowly pour a small amount of the warm milk into the egg yolk mixture, whisking constantly to temper the eggs. Tempering the eggs prevents them from scrambling when added to the hot milk. This gradual addition is key to a smooth custard.
4. Once the egg mixture is slightly warmed, gradually pour it back into the saucepan with the remaining milk, whisking continuously. Continue whisking over a low heat until the custard thickens. This will take a few minutes. The custard is ready when it coats the back of a spoon.
5. Remove the custard from the heat and immediately pour it through a fine-mesh sieve into a clean bowl. This removes any lumps and ensures a perfectly smooth texture. Pressing the sieve with a spatula will help extract every bit of the custard.
6. Cover the surface of the custard with cling film (plastic wrap) to prevent a skin from forming. Press the cling film directly onto the surface of the custard to avoid air pockets. This is an important step for maintaining the custard’s smooth texture.
7. Allow the custard to cool completely before adding it to your trifle. Refrigerate the custard until completely cool to prevent the trifle from becoming soggy. Once cooled, you can proceed to assemble your delicious British trifle!
Preparing the Fruit
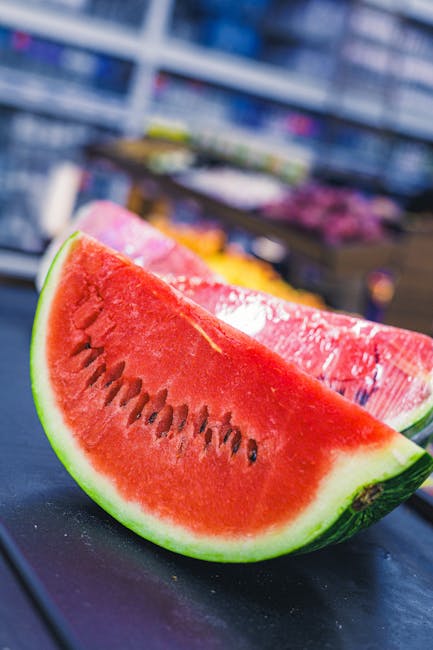
The success of a truly delicious British trifle hinges significantly on the quality and preparation of its fruit. We’ll be using a combination of fresh strawberries and raspberries, but feel free to adapt this to your preferences and seasonal availability. Consider adding other berries like blueberries or blackberries, or even chunks of stewed rhubarb for a delightful twist.
Begin with 500g of fresh strawberries. Wash them thoroughly under cold running water, ensuring you remove any traces of dirt or pesticide residue. Gently pat them dry with paper towels; excess moisture will dilute the flavour and make your trifle soggy.
Hull the strawberries. Using a small, sharp knife, carefully remove the green calyx (the leafy top) from each strawberry. For a more elegant presentation, you can slice the larger strawberries in half or quarters, depending on their size. Smaller strawberries can be left whole. Aim for a mix of whole and sliced strawberries for visual appeal and textural variety.
Next, prepare 250g of fresh raspberries. These delicate berries require even more gentle handling. Again, wash them gently under cold running water and pat them dry with paper towels. Avoid over-washing, as this can bruise the raspberries and make them mushy. Discard any raspberries that are overly soft or damaged.
Once the strawberries and raspberries are prepared, you might consider macerating them to enhance their flavour and release their juices. Macerating involves gently tossing the fruit with a little sugar to draw out the juices. For this recipe, use approximately 50g of caster sugar. Gently combine the sugar with the fruit in a large bowl. Avoid crushing the berries; you want to preserve their shape and texture.
Allow the macerated fruit to sit at room temperature for at least 30 minutes, or even longer in the refrigerator (up to a few hours). This allows the sugar to dissolve and the fruit to release its juices, creating a delicious and intensely fruity base for your trifle. If you are short on time, you can skip the macerating step, but the flavour will be slightly less intense.
Before layering the fruit in your trifle bowl, gently drain off any excess juice that has accumulated. This prevents the trifle from becoming overly wet and soggy. You can reserve this juice if you wish to use it as a flavouring agent in a glaze or sauce to accompany the trifle later.
Finally, remember that the preparation of your fruit significantly impacts the overall taste and texture of your trifle. Fresh, high-quality fruit is key. Taking the time to carefully wash, hull, and (optionally) macerate your fruit will elevate your trifle from good to truly exceptional.
Assembling the Trifle
Assembling a trifle is as much about artistry as it is about layering ingredients. The beauty of a trifle lies in its visual appeal, so take your time and enjoy the process! This recipe assumes you have already prepared all the components: sponge cake, custard, jelly, whipped cream, and your chosen fruit (e.g., strawberries, raspberries, or mixed berries).
Choosing your trifle bowl: Select a clear glass bowl, ideally one with a wide base and gently sloping sides. This allows for optimal viewing of the layered delights within. The size will depend on the number of servings you require; a 2-litre bowl is suitable for 6-8 people.
Layering the trifle: The order of layering is crucial for both flavour and texture. While variations exist, a classic approach works best. Begin by lining the bottom of the bowl with a layer of your prepared sponge cake. Cut the cake into roughly 1-inch cubes or fingers. Avoid using too much cake; approximately 200g of sponge cake, cubed, should suffice for a 2-litre trifle. This prevents the trifle from becoming overly heavy and cake-like.
Next, pour a layer of your set jelly over the cake. Ensure the jelly is completely cool but not set completely firm, as this will allow it to evenly coat the cake and prevent it from becoming soggy. Approximately 300ml of jelly is a good starting point; adjust according to your bowl size and personal preference. Allow the jelly to slightly settle before proceeding to the next layer.
Following the jelly, add a generous layer of custard. Use a good quality custard, either homemade or shop-bought – homemade custard provides a richer, more luxurious flavour. Around 400ml of custard should be adequate for this layer. Spread the custard evenly over the jelly layer using a spoon or spatula to ensure smooth coverage.
Now comes the fruit layer. Arrange your prepared fruit attractively on top of the custard. Use a variety of fruits for visual interest and contrasting textures. About 250g of mixed berries works well. You can macerate the berries in a little sugar and lemon juice beforehand to enhance their flavour and release their juices, creating a lovely syrupy layer.
Finally, top the trifle with a generous layer of softly whipped double cream. Do not over-whip the cream, as this will result in it becoming grainy. Aim for soft peaks. Approximately 300ml of double cream provides a substantial topping. You can pipe the cream for a more elegant presentation using a piping bag and nozzle. Alternatively, you can simply spread it evenly using a spoon.
Chilling and Serving: Once assembled, cover the trifle with cling film and refrigerate for at least 2 hours, preferably overnight. This allows the flavours to meld and the trifle to set properly. Before serving, remove the cling film and garnish with extra berries, chocolate shavings, or a sprinkle of icing sugar, if desired. Serve chilled and enjoy!
Delicious British Trifle: Recommendations
This delightful British Trifle is best served chilled for optimal flavour and texture. We recommend allowing it to chill in the refrigerator for at least 2 hours, or preferably overnight, before serving. This allows the flavors to meld and the sponge to absorb the lovely custard and juices.
Serving suggestions are plentiful! For a truly elegant presentation, serve individual portions in stemmed glasses or dessert bowls. Garnish with fresh berries, a sprig of mint, or a dusting of icing sugar for an extra touch of sophistication. Consider using a variety of berries for visual appeal and a burst of contrasting flavors. A small dollop of whipped cream just before serving adds a delightful textural contrast and a creamy sweetness.
Storage is crucial to maintaining the quality of your trifle. Once assembled, store the trifle in an airtight container in the refrigerator for up to 2 days. However, the longer it sits, the more the sponge will absorb the liquid, potentially making the texture slightly softer than initially intended. It’s best enjoyed within 24 hours of assembly for the optimal balance of textures and flavors.
To enhance your dining experience, consider pairing your Delicious British Trifle with complementary dishes. Its sweetness balances well with the savory notes of a light and fruity salad, perhaps with a vinaigrette dressing. A light, refreshing sorbet, like lemon or raspberry, can also cleanse the palate between courses. Avoid pairing it with overly rich or heavy desserts, as this might be overwhelming. A simple, buttery shortbread cookie could also be a delightful accompaniment.
Nutritional Information (per serving, approximate values may vary based on specific ingredients used):
- Calories: Approximately 400-500 kcal
- Fat: 20-25g
- Saturated Fat: 10-15g
- Carbohydrates: 60-70g
- Sugar: 40-50g
- Protein: 5-10g
Please note: This nutritional information is an estimate and can vary depending on the specific ingredients and quantities used. For precise values, it’s recommended to use a nutrition calculator with your exact recipe details.
Important Considerations: Always ensure your ingredients are fresh and of high quality. Proper hygiene is crucial throughout the preparation process. If using homemade custard, ensure it’s properly cooked to prevent bacterial growth. Adjust sweetness levels according to your preference. Enjoy responsibly!