The seemingly simple poached egg, a culinary marvel of perfectly set whites surrounding a molten yolk, boasts a surprisingly rich and complex history. While pinpointing its exact origin is difficult, evidence suggests that the technique of gently cooking eggs in simmering water dates back centuries, possibly even millennia. Ancient civilizations likely stumbled upon this method accidentally, discovering that a slow, careful approach yielded a far more palatable result than simply boiling an egg whole. The precise moment the poached egg as we know it emerged is lost to time, but its enduring popularity speaks volumes about its timeless appeal.
The evolution of the poached egg is intertwined with the availability and cultural significance of eggs themselves. In many cultures, eggs have long been a symbol of fertility, rebirth, and new beginnings. This symbolic weight is reflected in the careful preparation and presentation of poached eggs throughout history. In some regions, poached eggs have been a staple of peasant diets, a simple yet nutritious way to utilize readily available ingredients. In others, they became a delicacy, featured in elaborate dishes served at royal courts and aristocratic tables. The simplicity of the dish allowed for both humble and extravagant interpretations depending on the context.
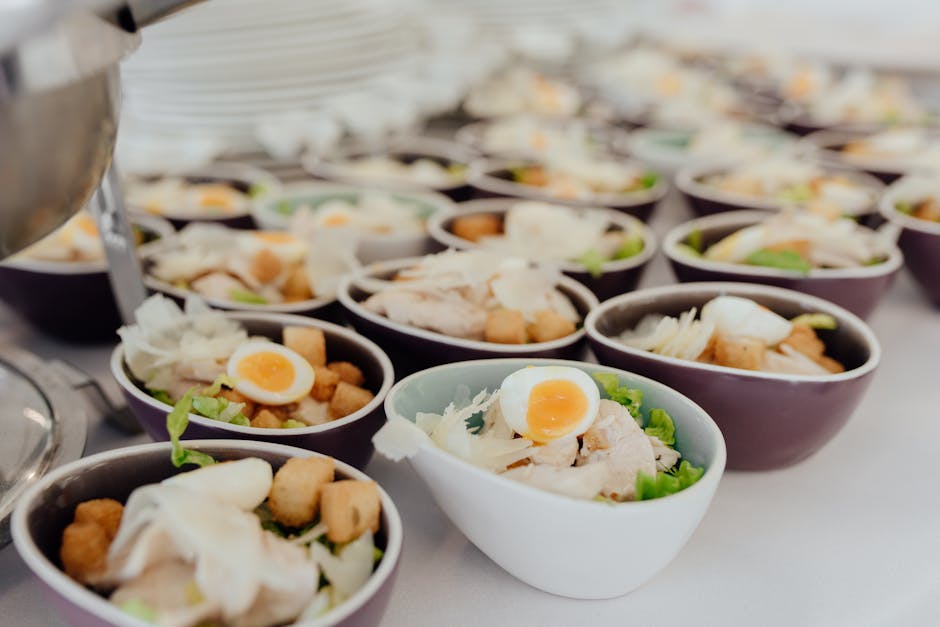
Today, the poached egg remains a global culinary staple, enjoyed in countless variations across different cuisines. A 2023 survey by the American Egg Board indicated that over 70% of Americans consume eggs at least once a week, with poached eggs ranking amongst the most popular preparation methods. This popularity is driven not only by its ease of preparation but also its versatility. From a simple breakfast atop toast to a sophisticated element in a gourmet salad or a hearty brunch dish like eggs Benedict, the poached egg’s adaptability is undeniable. Its nutritional value, containing high-quality protein and essential vitamins, further contributes to its widespread appeal.
The cultural significance of the poached egg extends beyond simple consumption. Its visual appeal – the delicate, almost ethereal quality of the softly set whites cradling the vibrant, golden yolk – has made it a frequent subject in still life paintings and culinary photography. The perfect poached egg, a testament to patience and precision, represents a small, achievable perfection in a world often characterized by complexity and chaos. This pursuit of perfection, this simple act of transforming a humble egg into a culinary masterpiece, is what makes the poached egg so enduringly fascinating.
Ingredients and Measurements
The beauty of a perfect poached egg lies not just in technique, but also in the quality of your ingredients. While the ingredient list is short, attention to detail makes all the difference.
Eggs: The foundation of your poached egg, naturally! Use the freshest eggs you can find. Fresh eggs hold their shape better during poaching, resulting in a neater, more aesthetically pleasing egg white. Older eggs tend to spread more, leading to a flatter, less defined poached egg. Aim for large or extra-large eggs for optimal results. The quantity will depend on how many poached eggs you’re making; simply adjust the other ingredients proportionally. For this recipe, we’ll assume you’re making two poached eggs.
Water: The medium in which your eggs will gently cook. You’ll need enough water to comfortably submerge the eggs without overcrowding. For two eggs, use approximately 2 cups (475ml) of water in a small saucepan. Using too little water can result in uneven cooking and sticking, while too much water can make it difficult to manage the eggs and control the temperature.
White Vinegar (Optional but Recommended): A small addition of white vinegar helps to coagulate the egg whites more quickly, resulting in a tighter, more compact egg white. It also helps to keep the egg white from spreading too much. We recommend using 1-2 tablespoons (15-30ml) of white vinegar. Don’t be tempted to add too much, as this can affect the taste of the egg. Apple cider vinegar or lemon juice can be substituted, but white vinegar is generally preferred for its neutral flavor.
Salt (Optional): A pinch of salt added to the water helps to season the egg and enhance its flavor. Use 1/4 teaspoon (1.25g) of salt for 2 cups of water. This is entirely optional and depends on your personal preference. You can also season the finished poached egg with salt and pepper to taste.
Other additions (Optional): While not essential, you might consider adding other aromatics to the poaching water for a more flavorful egg. A few cracked black peppercorns, a sprig of fresh thyme, or a bay leaf can subtly enhance the taste. However, avoid anything with strong flavors that might overpower the delicate taste of the egg. Remember to remove these aromatics before serving.
Precise Measurement Considerations: While the above measurements provide a good starting point, feel free to adjust them slightly based on your preference and the size of your saucepan. The key is to have enough water to gently simmer and create a gentle swirling motion without letting the eggs bump against each other or the sides of the pan.
Equipment Preparation: Mastering the Poached Egg Essentials
Achieving perfectly poached eggs hinges not just on technique, but also on meticulous equipment preparation. The right tools and their proper setup are crucial for consistent results. This section details the essential equipment and how to prepare it for poaching success.
1. Selecting the Right Pot: Choose a saucepan with a diameter of at least 6 inches (15cm). A larger diameter prevents overcrowding and ensures even water circulation. Avoid using pots that are too small, as this will lead to eggs clumping together and uneven cooking. A stainless steel saucepan is ideal, as it heats evenly and is easy to clean. Avoid non-stick pans for poaching eggs, as they do not allow for the proper formation of the egg white’s delicate structure.
2. Measuring the Water: Fill your chosen saucepan with approximately 4 cups (950ml) of water. This amount provides ample space for several eggs without overcrowding. The depth of the water should be sufficient to fully submerge the eggs, typically around 3-4 inches (7.5-10cm). Too little water will lead to uneven cooking and sticking, while too much water will increase cooking time and make it harder to manage the eggs.
3. Achieving the Perfect Simmer: Add a generous pinch of salt (approximately 1/2 teaspoon) to the water. This helps to season the eggs and also slightly raises the boiling point, aiding in the setting of the egg whites. Bring the water to a gentle simmer over medium heat. Avoid a rolling boil, as this will result in ragged, overcooked egg whites. The ideal simmer should feature small, barely visible bubbles rising to the surface. A gentle swirl of the water can help to maintain an even temperature and prevent sticking.
4. Preparing the Vinegar (Optional but Recommended): While not strictly necessary, adding a tablespoon (15ml) of white vinegar or lemon juice to the simmering water can help the egg whites coagulate more quickly and maintain a neater shape. This is particularly helpful for beginners. However, avoid using too much vinegar, as it can impart a strong acidic taste to the eggs. The vinegar’s primary role is to assist in the setting of the whites, not to dominate the flavor.
5. Utilizing a Slotted Spoon: Have a slotted spoon ready for gently maneuvering the eggs into the simmering water and later removing them from the pot. A large, flat-bottomed slotted spoon is ideal, as it allows for easy and gentle handling of the delicate poached eggs without breaking the yolks. Avoid using a perforated spoon with small holes, as these can tear the egg whites.
6. Preparing a Dish for Cooling: Once poached, the eggs need to be gently removed from the simmering water and allowed to cool slightly before serving. Prepare a dish lined with paper towels or a clean kitchen towel to absorb excess water. This ensures your poached eggs are not watery and maintains their delicate texture. Immediate serving from the hot water can result in a watery and less appealing poached egg.
By carefully preparing your equipment and following these steps, you’ll lay the foundation for perfectly poached eggs every time. Remember, consistency is key, and practicing these steps will build your confidence and refine your technique.
Water Preparation: The Foundation for Perfect Poached Eggs
The seemingly simple act of preparing the poaching water is crucial to achieving perfectly poached eggs. Neglecting this step can lead to tough whites, runny yolks, or eggs that stick to the pan. Proper water preparation ensures gentle, even cooking and a flawless result.
Begin by selecting a suitable pot. A saucepan with a diameter of at least 8 inches is ideal. Avoid using a pot that’s too small, as overcrowding will lower the water temperature and lead to uneven cooking. A larger pot also allows for easier egg retrieval.
Next, fill the pot with approximately 3-4 cups (700-950ml) of water. Don’t use more than you need; too much water will dilute the vinegar and salt, reducing their effectiveness. The ideal water level should be at least 2 inches deep to ensure the eggs are fully submerged during poaching.
Adding acidity is key to achieving firm, neatly formed egg whites. The most common addition is white vinegar or distilled white vinegar. Add 1-2 tablespoons (15-30ml) of white vinegar to the water. This helps the egg whites coagulate quickly, preventing them from spreading out too much. Avoid using other types of vinegar, such as balsamic or red wine vinegar, as their strong flavors can affect the taste of the eggs.
A pinch of salt also plays a vital role in the poaching process. Add about 1/2 teaspoon (2.5g) of salt to the water. This helps season the eggs subtly and also contributes to firmer egg whites. The salt helps to season the egg white and keeps the whites compact. Don’t be afraid to adjust the amount of salt to your preference.
Once the vinegar and salt are added, bring the water to a gentle simmer over medium heat. Avoid a rolling boil; vigorous bubbling will agitate the eggs and result in ragged whites. The ideal water temperature should be just below a simmer, with only small, gentle bubbles rising to the surface. This gentle simmer allows the eggs to cook slowly and evenly.
Before adding the eggs, ensure the water is consistently simmering. If the water is too hot, the whites will cook too quickly and become tough. If it’s too cold, the whites will spread and become ragged. Take a few moments to carefully observe the water’s movement. A gentle, consistent simmer is your goal.
Finally, once the water is at the perfect simmer, you are ready to gently crack and poach your eggs. Preparing the water correctly is the first crucial step to achieving the perfect poached egg. Remember, attention to detail in this initial phase will significantly impact the final result.
Egg Preparation: Mastering the Foundation
Before you even think about submerging your eggs in simmering water, proper preparation is key to achieving perfect poached eggs. This stage sets the stage for a flawlessly cooked egg, ensuring a tender white and a perfectly runny yolk. We’ll cover everything from egg selection to the crucial pre-poaching steps.
Egg Selection: Begin with the freshest eggs you can find. Fresher eggs hold their shape better during poaching, resulting in a neater, less spread-out egg white. Room temperature eggs are crucial. Cold eggs will likely result in a more ragged white that cooks unevenly and takes longer to set. Allow your eggs to sit at room temperature for at least 30 minutes before poaching.
Vinegar: A Poaching Essential: Adding a splash of vinegar (white vinegar or cider vinegar works well) to your poaching water is a game-changer. The acidity of the vinegar helps the egg whites coagulate more quickly, preventing them from spreading too much and creating a more compact, aesthetically pleasing poached egg. Use approximately 1 tablespoon of vinegar per quart (liter) of water.
Preparing the Poaching Water: The ideal poaching water temperature is crucial. Bring a small saucepan (about 2 quarts/2 liters capacity) filled with water to a gentle simmer, not a rolling boil. A rolling boil will cook the eggs too quickly and result in tough whites and a hard yolk. The water should have a gentle, barely perceptible movement on the surface. Once simmering, reduce the heat to maintain the gentle simmer throughout the poaching process. Remember to add your vinegar at this point.
Egg Cracking Technique: Cracking the eggs carefully is essential to avoid getting bits of shell in your poached egg. Crack each egg individually into a small bowl. This allows for easy removal of any stray shell fragments before gently sliding the egg into the simmering water. Avoid cracking the eggs directly into the poaching water as this increases the risk of shell pieces falling in. Using a fine-mesh sieve to strain the eggs before transferring them to the simmering water is another excellent way to remove shell fragments.
Creating a Gentle Vortex: Once the water is at a gentle simmer, gently swirl the water in a circular motion to create a small vortex. This helps the egg white to wrap around the yolk more neatly and evenly as you carefully slide the egg into the center of the swirling water. This technique helps to prevent the egg white from spreading too thinly and unevenly.
Quantity Considerations: Avoid overcrowding the pan. Poach eggs individually or in small batches (no more than 2-3 eggs at a time in a 2-quart saucepan) to ensure even cooking and prevent the temperature from dropping too drastically. Overcrowding will lead to uneven cooking and lower quality poached eggs.
Following these steps carefully will ensure that your eggs are perfectly prepared for poaching, setting the stage for that perfect runny yolk and tender white you’ve been dreaming of.
Poaching Technique
Poaching eggs might seem daunting, but with the right technique, achieving perfectly cooked eggs is surprisingly simple. The key is gentle handling and maintaining a consistent simmering water temperature. This section will guide you through the process step-by-step, ensuring you master this classic cooking method.
Start with the right pot: A medium-sized saucepan with a wide base is ideal. This allows for even heat distribution and prevents overcrowding, which can lower the water temperature and result in unevenly cooked eggs. A non-stick saucepan is also beneficial, minimizing the chances of the eggs sticking to the bottom.
Prepare the poaching water: Fill your saucepan with about 2 inches (5cm) of water. Add a splash of white vinegar (about 1 tablespoon to 1 cup of water) or lemon juice. This slightly acidic environment helps the egg whites coagulate faster, resulting in a neater, more compact poached egg. Do not salt the water; this can make the whites tough.
Bring the water to a gentle simmer: This is crucial. A rolling boil will cause the eggs to become overly cooked and rubbery. You want a gentle simmer, with small, barely perceptible bubbles rising to the surface. Once simmering, reduce the heat to maintain this temperature. Using a thermometer is helpful for precise control; aim for a temperature of around 185-190°F (85-88°C).
Prepare the eggs: Crack each egg individually into a small bowl. This allows you to remove any broken pieces of shell before adding the egg to the water. This prevents stray bits of shell from cooking into the egg white, creating an unsightly and potentially unpleasant texture. Use fresh, cold eggs: They hold their shape better during poaching.
Gently add the eggs to the simmering water: Create a gentle swirl in the water using a spoon. This helps to prevent the egg whites from spreading too much. Pour the egg into the center of the swirling water. Repeat with remaining eggs, ensuring they are not overcrowded.
Poach for the desired doneness: For a runny yolk, poach for 3-4 minutes. For a slightly firmer yolk, poach for 4-5 minutes. For a fully cooked yolk, poach for 5-6 minutes. Remember that the eggs will continue to cook slightly after being removed from the water, so slightly undercook them to achieve your desired final result.
Remove and serve: Use a slotted spoon to carefully remove the poached eggs from the water. Gently place them on a paper towel-lined plate to absorb any excess water. Season with salt and pepper to taste. Serve immediately on toast, in salads, or as part of a more elaborate dish.
Troubleshooting: If your egg whites are spreading too much, it’s likely that the water is too hot. Reduce the heat to a gentler simmer. If the yolks are breaking, you may be handling the eggs too roughly. Practice gentle movements when adding them to the water and removing them with the slotted spoon. Experiment with different poaching times to find your preferred level of doneness.
Professional Tip: For perfectly round poached eggs, use a small ramekin or cookie cutter to create a well in the swirling water before adding the egg. This will help contain the whites and create a more even shape.
Testing for Doneness
Achieving perfectly poached eggs hinges on understanding how to test for doneness without breaking the delicate whites. There’s no single magic number for cooking time; variables like egg freshness and water temperature significantly impact the result. Therefore, visual inspection is paramount.
The key is to look for a firm, set white and a runny, but not completely liquid, yolk. The whites should be opaque and no longer translucent, indicating they’ve fully coagulated. The yolk, on the other hand, should be a vibrant, golden orange and jiggle slightly when the egg is gently nudged. Avoid overcooking, which results in a tough, rubbery white and a hard, dry yolk.
Start checking your eggs after 3 minutes of poaching. Use a slotted spoon to gently lift an egg from the simmering water. Do not pierce the egg with a utensil, as this can cause the yolk to leak. Instead, tilt the spoon slightly to allow excess water to drain. Examine the egg carefully against a bright background.
If the whites are still mostly translucent and the yolk is very runny, return the egg to the water and continue poaching for another 30 seconds to a minute. Remember to gently swirl the water occasionally to prevent the eggs from sticking to the bottom of the pan. This will also ensure even cooking.
If the whites are mostly set but the yolk is still too runny, continue poaching in 15-second intervals, checking frequently. This allows for fine-tuning the doneness to your preference. Some people prefer a slightly firmer yolk, while others like it very runny. The goal is to find the perfect balance between a set white and a desirable yolk consistency.
If you’re unsure, it’s always better to slightly undercook the egg than overcook it. A slightly runny yolk can be easily remedied by letting the poached egg rest for a minute or two after removing it from the water; the residual heat will continue to cook the yolk slightly.
Consider the size of your eggs: larger eggs will generally require a slightly longer cooking time than smaller eggs. Fresh eggs tend to hold their shape better and require a little less cooking time compared to older eggs. Experimentation is key to mastering the perfect poached egg, so don’t be afraid to adjust your cooking times based on your observations.
Once you’ve achieved the desired doneness, carefully remove the egg using a slotted spoon and place it on a paper towel-lined plate to absorb excess water. Serve immediately and enjoy your perfectly poached egg!
Perfect Poached Eggs: Recommendations
To achieve truly perfect poached eggs, fresh, high-quality eggs are crucial. Older eggs tend to spread more in the water, resulting in a less-defined shape. Ensure your eggs are at room temperature before poaching; this helps them hold their shape better and cook more evenly. Experiment with different vinegar types (white vinegar is common, but apple cider vinegar can add a subtle flavor) to find your preference for achieving a firm, neat white and a perfectly runny yolk.
Serving Suggestions: Poached eggs are incredibly versatile and can be enjoyed in countless ways. A classic pairing is with toasted whole-wheat bread, topped with everything bagel seasoning or a sprinkle of flaky sea salt and freshly ground black pepper. For a richer experience, serve your poached egg atop creamy avocado toast, or on a bed of wilted spinach with a drizzle of hollandaise sauce. They also make an excellent addition to salads, soups, and grain bowls, adding a protein boost and a luxurious touch.
Storage: While poached eggs are best enjoyed immediately after cooking, leftovers can be stored in an airtight container in the refrigerator for up to 24 hours. However, the texture may slightly change. Reheat gently in the microwave or in a pan with a little butter or oil, ensuring the yolk doesn’t become overcooked. Do not refreeze poached eggs.
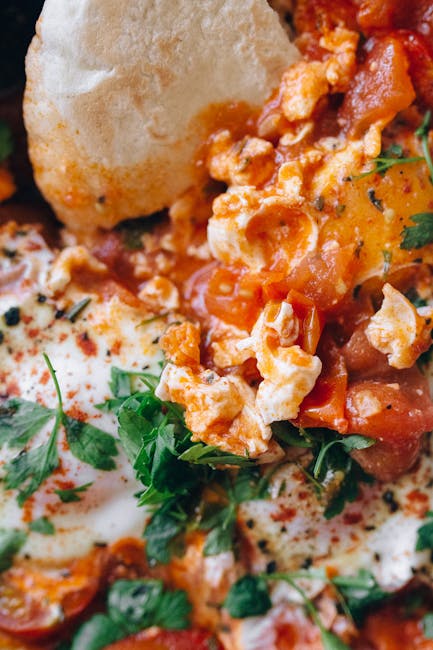
Complementary Dishes: The possibilities are truly endless! Poached eggs are a fantastic addition to breakfast burritos, shakshuka (a Middle Eastern and North African egg dish simmered in a spicy tomato sauce), and even ramen or pho. They pair beautifully with smoked salmon and cream cheese on bagels or croissants. Consider adding them to a hearty breakfast bowl with roasted vegetables, quinoa, and a tahini dressing. For a lighter meal, combine them with a simple green salad and a light vinaigrette.
Nutritional Information (per egg, approximate): The nutritional content of a poached egg can vary slightly depending on the size of the egg. However, a large poached egg typically contains approximately 78 calories, 6 grams of protein, 5 grams of fat, and less than 1 gram of carbohydrates. They are a great source of choline, an essential nutrient for brain health, and contain various vitamins and minerals, including vitamin D, vitamin B12, and selenium. Note: These values are estimates and can vary based on egg size and preparation method.
Important Note: Always ensure your eggs are cooked to a safe internal temperature of 160°F (71°C) to minimize the risk of foodborne illness. While a runny yolk is desirable for many, those with compromised immune systems should ensure the egg white and yolk are fully cooked.