Easy Banana Ice Cream, a deceptively simple dessert, boasts a surprisingly rich history interwoven with the global journey of the banana itself. While pinpointing an exact origin for this specific recipe is difficult, its existence is intrinsically linked to the widespread availability of bananas, a fruit whose journey from tropical obscurity to global supermarket staple is a fascinating tale. Bananas, originally cultivated in Southeast Asia thousands of years ago, were gradually spread across the globe by traders and explorers, eventually finding fertile ground in the Americas. The development of efficient refrigeration and transportation in the 20th century played a crucial role in making bananas a readily available and affordable fruit worldwide, paving the way for countless recipes, including the easy banana ice cream we enjoy today.
The simplicity of this dessert is its greatest strength. Unlike many ice creams requiring specialized equipment and numerous ingredients, banana ice cream relies primarily on frozen bananas, highlighting the natural sweetness and creaminess of the fruit itself. This accessibility has made it a favorite amongst health-conscious individuals and those seeking quick, easy, and delicious treats. The elimination of dairy and refined sugars also makes it an attractive option for individuals with dietary restrictions. In recent years, the popularity of vegan and plant-based diets has significantly boosted the popularity of this simple dessert, with numerous online recipes and variations emerging. Blogs and social media platforms are flooded with pictures and reviews of homemade banana ice cream, testament to its enduring appeal.
Beyond its individual appeal, easy banana ice cream holds a certain cultural significance. It represents a connection to simpler times, a return to using whole foods, and a celebration of the abundance of readily available fruit. In many cultures, bananas are associated with happiness, abundance, and fertility, adding symbolic depth to a dessert made primarily from this fruit. Its ease of preparation makes it a perfect dessert for families with children, encouraging participation in the kitchen and fostering a connection to food preparation. Furthermore, the adaptability of the recipe – additions of chocolate, peanut butter, or other fruits – allows for endless customization, reflecting individual tastes and cultural preferences. The statistics on banana consumption globally are staggering, and a significant portion of this consumption directly or indirectly contributes to the popularity of countless banana-based desserts, including this beloved easy ice cream.
In conclusion, easy banana ice cream, while seemingly uncomplicated, embodies a complex history of global trade, technological advancements, and evolving dietary trends. Its accessibility, health benefits, and adaptability contribute to its enduring popularity, making it more than just a dessert; it’s a reflection of our evolving relationship with food and a testament to the power of simple ingredients.
Ingredients and Measurements
This recipe for Easy Banana Ice Cream relies on the simple magic of frozen bananas. The quality of your bananas will significantly impact the final result, so choosing ripe, even overripe, bananas is crucial. Avoid bananas with bruises or brown spots that are too mushy, as these can affect the texture and flavor of your ice cream.
Banana Quantity: The recipe calls for 3 large, ripe bananas (approximately 1.5 pounds or 680 grams). This amount yields approximately 2 cups of ice cream. Feel free to adjust the quantity based on your desired yield. For a larger batch, simply increase the number of bananas proportionally. Remember that the riper the bananas, the sweeter the ice cream will be.
Optional Ingredients: The beauty of this recipe lies in its adaptability. You can easily customize the flavor profile by adding various ingredients. The following are suggestions, with recommended quantities:
- Cocoa Powder: 2-3 tablespoons unsweetened cocoa powder for a rich chocolate banana ice cream. Start with 2 tablespoons and add more to taste, depending on your preferred chocolate intensity.
- Peanut Butter: 2-4 tablespoons of creamy peanut butter adds a delightful nutty and creamy dimension. Again, start with a smaller amount and adjust according to your preference. Using natural peanut butter may result in a slightly grainier texture.
- Vanilla Extract: 1 teaspoon of pure vanilla extract enhances the overall flavor. Using high-quality vanilla extract is recommended for the best results.
- Other Flavorings: Get creative! Consider adding extracts like almond, peppermint, or maple. You can also incorporate finely chopped nuts, chocolate chips, or dried fruits. Remember to adjust quantities based on your preferred intensity.
- Sweeteners: While ripe bananas provide sufficient sweetness, you might want to add a touch more depending on your preference and the ripeness of your bananas. A tablespoon or two of maple syrup, honey, or agave nectar can be added to taste. Start with a smaller amount and add more gradually to avoid making the ice cream too sweet.
Measurement Precision: While precise measurements aren’t strictly necessary for this recipe, using a kitchen scale for weighing the bananas ensures consistency. For liquid ingredients, use standard measuring spoons and cups. Accuracy in measuring dry ingredients like cocoa powder will influence the flavor intensity of your ice cream. Using a scale for dry ingredients is highly recommended for more consistent results.
Ingredient Quality: The quality of your ingredients directly impacts the overall taste and texture of your ice cream. Using organic bananas and high-quality cocoa powder, peanut butter, and vanilla extract will elevate the final product. Prioritize using fresh, high-quality ingredients whenever possible.
Remember to always thoroughly wash your fruits and vegetables before preparing any recipe. Enjoy your homemade, delicious, and healthy banana ice cream!
Equipment List
Making delicious and easy banana ice cream requires minimal equipment, but the right tools can significantly enhance the process and the final result. This list details the essential and optional equipment, providing recommendations to help you achieve the best texture and flavor.
Essential Equipment:
1. Freezer-Safe Containers: You’ll need at least one airtight, freezer-safe container to store your sliced bananas before freezing and another to freeze the final ice cream. Choose containers that are appropriately sized for your batch. For a recipe yielding about 2 cups of ice cream, a 2-quart container works well. Avoid using containers with sharp edges or those that might crack under freezing temperatures. Glass or high-quality food-grade plastic are recommended.
2. Sharp Knife and Cutting Board: A sharp knife is crucial for efficiently slicing the bananas into even-sized pieces. Uniformly sized pieces ensure even freezing and prevent some parts from being too hard or too soft during the blending process. A sturdy cutting board will protect your work surface.
3. Food Processor or High-Powered Blender: This is the workhorse of the process. A powerful food processor or blender is necessary to achieve a smooth, creamy texture. A less powerful blender may struggle to process frozen bananas effectively, resulting in a chunky ice cream. If using a blender, work in batches to prevent overloading the motor. Look for a blender with at least 1000 watts of power.
4. Measuring Cups and Spoons: Accurate measurements are important, especially if you plan to add other ingredients like cocoa powder, peanut butter, or extracts. Use standard measuring cups and spoons to ensure consistent results.
Optional but Recommended Equipment:
1. Parchment Paper or Baking Sheet: Laying your sliced bananas on a parchment-lined baking sheet before freezing helps prevent them from sticking together. This makes blending much easier. This is highly recommended for easier processing and cleanup.
2. Spatula or Scraper: A rubber spatula or scraper is useful for scraping down the sides of the food processor or blender to ensure all the frozen bananas are incorporated. This prevents leaving unblended chunks of banana in the final product.
3. Ice Cream Scoop: While not strictly necessary, an ice cream scoop makes serving the frozen banana ice cream much easier. Choose a scoop with a sturdy handle to easily scoop the frozen treat.
4. Kitchen Scale (Optional but Helpful): While not essential, a kitchen scale provides more precise measurements, particularly helpful when working with multiple ingredients. This ensures consistent results between batches.
By using the recommended equipment, you’ll be well-equipped to create a delicious and creamy banana ice cream experience. Remember to always prioritize safety and cleanliness when handling food and equipment.
Preparation Phase (includes peeling and slicing bananas)
The success of your easy banana ice cream hinges significantly on the preparation phase. While seemingly simple, proper banana handling ensures a smooth, creamy texture and prevents undesirable ice crystal formation. This section details the optimal methods for peeling and slicing your bananas, maximizing the quality of your final product.
Begin by selecting ripe, but not overripe, bananas. Overripe bananas, while sweeter, can lead to a mushy ice cream. Aim for bananas with bright yellow peels, possibly with a few brown spots indicating optimal sweetness. Avoid bananas with significant bruising or dark brown patches.
The quantity of bananas needed will depend on your desired yield. A good starting point is three to four medium-sized bananas for approximately two cups of ice cream. You can easily adjust this quantity based on your serving needs. For larger batches, simply increase the number of bananas proportionally.
Now, let’s tackle the peeling process. The most efficient method involves using a sharp knife. Hold the banana firmly and make a shallow incision along the length of the peel, starting at the stem end. Gently peel back the peel, revealing the creamy yellow flesh. Avoid excessive pressure to prevent damaging the banana’s delicate flesh. You can also use your thumbnail to start the peeling process, creating a small entry point for the knife.
Once peeled, it’s crucial to slice the bananas uniformly. Consistent slicing ensures even freezing and prevents some parts of the ice cream from being overly frozen while others are soft. Aim for slices that are approximately ½ inch to ¾ inch thick. Thicker slices will take slightly longer to freeze, while thinner slices may freeze too quickly, resulting in a less creamy texture. Consistency is key here.
Consider the storage of your prepared bananas. If you are not immediately making the ice cream, it’s best to freeze the sliced bananas on a baking sheet lined with parchment paper. This prevents the slices from sticking together and ensures individual freezing, leading to a smoother final product. Once frozen solid (usually after 2-3 hours), you can transfer the frozen banana slices into a freezer bag for longer storage.
Proper preparation is paramount. Taking the time to select ripe bananas, peel them carefully, and slice them uniformly will significantly enhance the final taste and texture of your homemade banana ice cream. Remember, this seemingly straightforward step is the foundation for a delicious and enjoyable dessert.
Freezing Process
The freezing process is crucial for achieving a smooth and creamy banana ice cream. While seemingly simple, a few key steps can significantly impact the final texture and quality. This section details the optimal method for freezing your banana mixture to ensure delicious results.
Start with perfectly ripe bananas. The riper the bananas, the sweeter and creamier your ice cream will be. Overripe bananas, with brown spots on the peel, are ideal. Aim for about 3-4 medium-sized bananas (approximately 1 pound). Peel the bananas and cut them into 1-inch thick slices. Avoid using green or slightly underripe bananas as they will lack the necessary sweetness and will result in a less creamy texture.
Freezing the banana slices: Arrange the banana slices in a single layer on a parchment-lined baking sheet. Do not overcrowd the sheet; ensure there’s space between each slice to prevent them from sticking together. This method of freezing prevents the bananas from clumping, making them easier to blend later. Freeze for at least 2-3 hours, or until completely solid. Freezing in a single layer is crucial for preventing large ice crystals from forming.
Transferring frozen bananas: Once frozen solid, carefully transfer the banana slices to a freezer-safe bag or container. A zip-top freezer bag works well. Ensure the bag is completely sealed to prevent freezer burn, which can affect the flavor and texture of your ice cream. You can freeze the banana slices for up to 3 months. Proper storage is key to maintaining quality.
Blending the frozen bananas: When ready to make your ice cream, remove the frozen banana slices from the freezer about 10-15 minutes before blending. This allows them to soften slightly, making them easier to process in a food processor or high-powered blender. Do not let them thaw completely; they should still be firm. Add the frozen banana slices to your food processor or blender. Begin blending on a low speed, gradually increasing to high speed as the bananas break down. Scrape down the sides of the bowl as needed to ensure everything is evenly blended.
Achieving the desired consistency: The consistency of your ice cream will depend on the blending time. For a smoother, creamier texture, blend for a longer period, up to 2-3 minutes. If you prefer a slightly chunkier ice cream, blend for a shorter time. Experiment to find your preferred consistency. Remember to pause and scrape down the sides during the blending process to ensure even blending.
Adding ingredients (optional): Once the banana base is blended to your desired consistency, you can add other ingredients such as cocoa powder, nut butter, vanilla extract, or other flavorings. Blend again until well incorporated. Add liquid ingredients sparingly, as too much liquid can make the ice cream icy.
Post-blend freezing (optional): For a firmer, more traditional ice cream texture, you can transfer the blended mixture to a freezer-safe container and freeze it for another 30-60 minutes to allow it to firm up further. This step isn’t always necessary, especially if you prefer a softer serve consistency. Always taste test before serving to ensure perfect sweetness and flavor.
Blending Instructions
Making perfectly smooth and creamy banana ice cream requires attention to detail during the blending process. Follow these instructions carefully to achieve the best results. This recipe assumes you are using a high-powered blender, such as a Vitamix or Blendtec. If you have a less powerful blender, you may need to adjust the blending time and add a little more liquid.
Step 1: Freezing the Bananas: Before you begin, ensure your bananas are properly frozen. This is crucial for achieving the right consistency. Peel ripe, but not overripe, bananas (avoid bananas with brown spots that are too soft). Slice them into 1-inch thick rounds and place them on a baking sheet lined with parchment paper. Freeze them for at least 4 hours, or preferably overnight, until they are solid. Proper freezing prevents clumping and ensures a smoother final product.
Step 2: Preparing the Blender: Add the frozen banana slices (approximately 3 medium-sized bananas, yielding about 2 cups of frozen slices) to your blender. Start with a smaller quantity if you’re unsure of your blender’s capacity. It’s better to blend in batches than to overload the blender, which can lead to inefficient blending and potential damage to your appliance.
Step 3: Initial Blending: Begin blending on a low speed. This helps to break up the frozen banana pieces without splattering them up the sides of the blender. Gradually increase the speed to medium, then high. Scrape down the sides of the blender frequently using a spatula or tamper (if your blender includes one) to ensure all the banana is incorporated and blended evenly. This is particularly important with frozen ingredients.
Step 4: Achieving the Desired Consistency: Continue blending on high speed for 1-2 minutes, or until the mixture is completely smooth and creamy. The ice cream should be thick and resemble soft-serve ice cream. If the mixture is too thick, add 1-2 tablespoons of your chosen liquid (milk, almond milk, coconut milk, or even a little banana juice) at a time, blending after each addition until you reach the desired consistency. Avoid adding too much liquid at once, as this can make the ice cream too thin and icy.
Step 5: Optional Add-ins: Once the banana base is perfectly smooth, you can add any desired add-ins. This could include cocoa powder for chocolate ice cream, peanut butter for peanut butter banana ice cream, or vanilla extract for a classic flavor. Blend for another 15-30 seconds to incorporate the add-ins fully. Add-ins should be added after the banana base is completely blended to avoid uneven distribution.
Step 6: Serving and Storage: Immediately serve your delicious banana ice cream. For a colder, firmer consistency, transfer the ice cream to an airtight container and freeze it for at least 30 minutes before serving. For best results, consume the ice cream within 3-4 days of making it. The texture may change slightly after this time.
Serving Suggestions
Your Easy Banana Ice Cream is ready to be enjoyed! But how you serve it can significantly enhance the overall experience. Here are some ideas to elevate your simple banana ice cream into a truly delightful treat.
Classic Simplicity: The beauty of this recipe lies in its simplicity. Scoop 1-2 generous scoops (approximately ½ cup to 1 cup) into a bowl and savor the pure banana flavor. You can garnish with a few chopped banana slices for added texture and visual appeal. This is perfect for those who appreciate the natural sweetness and creaminess of the bananas themselves.
Elevated Sundaes: Transform your banana ice cream into a decadent sundae. Start with 1 ½ cups of ice cream in a bowl or a tall glass. Drizzle generously with your favorite toppings. Consider 2 tablespoons of chocolate syrup, a sprinkle of chopped nuts (1 tablespoon of pecans or walnuts work well), and a dollop of whipped cream (approximately 2 tablespoons). A cherry on top adds a touch of classic flair.
Banana Split Extravaganza: For a truly impressive dessert, create a banana split. Split a ripe banana lengthwise (about 6 inches long) and place it in a long dish. Fill each side with approximately ¾ cup of banana ice cream. Top with your choice of toppings – consider ½ cup of strawberries, ¼ cup of blueberries, 2 tablespoons of chocolate sauce, and a drizzle of caramel (1 tablespoon). A sprinkle of chopped nuts (1 tablespoon) provides extra crunch.
Frozen Banana Pops: For a fun and refreshing treat, especially for kids, transform your ice cream into frozen banana pops. Fill small popsicle molds (approximately 4 ounces each) with the ice cream, leaving a little space at the top. Insert popsicle sticks and freeze for at least 4 hours, or until solid. These are perfect for a hot summer day!
Creative Combinations: Don’t be afraid to experiment! The mild sweetness of banana ice cream makes it a versatile base for a variety of flavors and textures. Try adding a swirl of peanut butter (2 tablespoons), a sprinkle of cinnamon (½ teaspoon), or a drizzle of honey (1 tablespoon). Consider incorporating other fruits like berries or mango for a tropical twist.
Temperature is Key: For the best texture and flavor, allow your banana ice cream to soften slightly before serving. This will make it easier to scoop and will enhance the creamy consistency. If it’s too hard, let it sit at room temperature for a few minutes. Avoid letting it melt completely, however, as this will affect the texture.
Storage Recommendations: Store leftover banana ice cream in an airtight container in the freezer for up to 2 weeks. Remember to allow it to soften slightly before serving again.
Presentation Matters: Even simple servings can be visually appealing. Use attractive bowls or dishes, and consider garnishing with fresh fruit, chocolate shavings, or a sprig of mint. A little attention to detail can elevate your dessert from good to great.
Recommendations for Easy Banana Ice Cream
This Easy Banana Ice Cream recipe is a delightful treat, perfect for satisfying your sweet tooth while enjoying a healthy and naturally delicious dessert. To maximize your enjoyment and ensure the best possible outcome, consider the following recommendations.
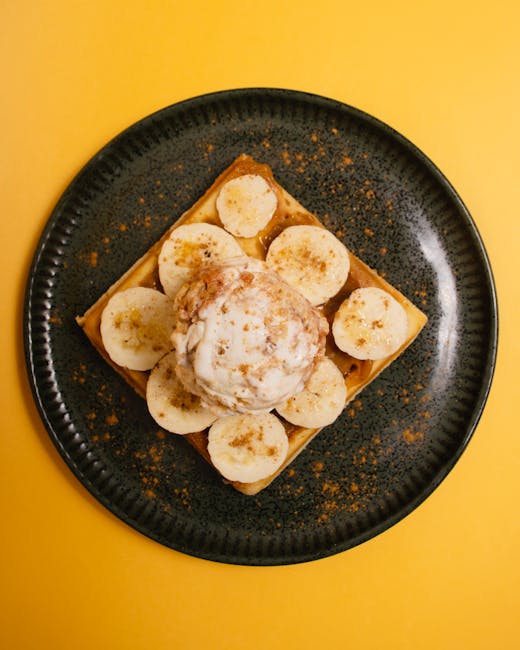
Serving Suggestions: The versatility of this ice cream allows for a multitude of serving options. Enjoy it straight from the freezer as a simple, refreshing dessert. For an elevated experience, consider topping it with various ingredients like fresh berries (strawberries, blueberries, raspberries), chopped nuts (almonds, walnuts, pecans), chocolate shavings, caramel sauce, or a sprinkle of cinnamon. A drizzle of honey or maple syrup adds another layer of sweetness. You can also serve it in a waffle cone, a bowl with crushed cookies, or even use it as a filling for baked goods like ice cream sandwiches or pies. Get creative and experiment with different flavor combinations!
Storage Conditions: For optimal freshness and texture, store your Easy Banana Ice Cream in an airtight container in the freezer. It should ideally be consumed within 2 weeks for the best quality. While it may remain safe to eat beyond this timeframe, the texture and flavor may slightly degrade. Avoid repeated freeze-thaw cycles, as this can impact the creaminess of the ice cream. If you notice any ice crystals forming, give the container a good stir before serving to redistribute the frozen banana chunks and improve the consistency.
Complementary Dishes: This simple ice cream pairs beautifully with a range of desserts and dishes. It’s a fantastic accompaniment to warm apple crumble, a slice of chocolate cake, or even a light fruit salad. The natural sweetness of the banana ice cream complements the tartness of berry pies or cobblers. It also works well as a dessert topping for pancakes, waffles, or French toast. For a truly indulgent experience, try it with a warm brownie or a piece of your favorite pie.
Nutritional Information (Approximate per serving – 1/2 cup): The exact nutritional content will vary slightly depending on the specific bananas used and any added toppings. However, a general estimate per 1/2 cup serving is as follows: Calories: Approximately 150-200; Fat: 1-2g; Carbohydrates: 30-40g; Sugar: 15-20g; Fiber: 3-4g; Protein: 1-2g. This makes it a relatively healthy dessert option compared to commercially produced ice creams, which often contain higher levels of added sugar and fat.
Important Note: These nutritional values are estimates and may vary. For precise nutritional information, use a nutrition calculator and input the exact ingredients and quantities used in your recipe. Remember to adjust serving sizes based on individual needs and dietary requirements.
Enjoy your delicious and healthy homemade Easy Banana Ice Cream!