Healthy protein energy balls, a seemingly modern snack, actually trace their roots back to ancient cultures who instinctively understood the importance of portable, nutrient-dense foods. While the precise origin remains elusive, similar concepts existed across various societies. Think of the ancient Greeks’ reliance on barley cakes and nuts for sustained energy during long journeys, or the nomadic tribes of Central Asia who utilized dried fruits and seeds in similar compacted forms for sustenance on the move. These early iterations lacked the refined ingredients and sophisticated nutritional understanding we have today, but they fundamentally served the same purpose: providing a convenient and energy-boosting snack. The modern iteration, however, emerged more recently, likely gaining traction in the health and wellness boom of the late 20th and early 21st centuries.
The rise of energy balls as a popular snack is intrinsically linked to the growing awareness of the importance of healthy eating and convenient nutrition. The global health and wellness market is booming, exceeding $7 trillion in 2025, according to Global Wellness Institute reports. This surge has fuelled demand for quick and easy-to-prepare snacks that meet specific dietary needs. Energy balls perfectly satisfy this demand, offering a customizable and portable solution. Their popularity is further amplified by the increasing prevalence of fitness and active lifestyles; athletes and individuals striving for better health are actively seeking out nutrient-dense foods that support their daily activities. This has led to a proliferation of recipes and variations, each tailored to specific dietary preferences and nutritional goals.
Culturally, energy balls represent a fascinating convergence of global food traditions. Their adaptability allows for the incorporation of ingredients from diverse cuisines. We see variations featuring ingredients like dates from the Middle East, coconut from Southeast Asia, nuts from various regions, and seeds from across the globe. This fusion reflects the increasingly interconnected global food landscape and the growing appreciation for diverse culinary traditions. Moreover, the DIY nature of energy ball recipes encourages creative expression and customization, transforming them into a personalized culinary experience. The ease of making them at home, using readily available ingredients, adds to their cultural significance, empowering individuals to take control of their nutrition in a simple and satisfying way.
Beyond their cultural and historical context, energy balls offer a significant nutritional advantage. They are a concentrated source of protein, carbohydrates, and healthy fats, providing sustained energy and aiding in muscle recovery. They are often rich in fiber, contributing to digestive health, and can be fortified with vitamins and minerals through careful ingredient selection. While specific nutritional content varies depending on the recipe, a typical energy ball can provide a significant portion of daily recommended intake of essential nutrients. This makes them a powerful tool for maintaining a balanced diet and promoting overall well-being, further solidifying their position as a modern, yet historically rooted, healthy snack.
Ingredients and Measurements
This recipe for Healthy Protein Energy Balls prioritizes whole, unprocessed ingredients to maximize nutritional benefits and minimize added sugars. Precise measurements are crucial for achieving the optimal texture and flavor. Using a kitchen scale is highly recommended for accuracy, especially when working with ingredients like nut butters, which can vary in density.
Dates: 1 cup (pitted Medjool dates, packed). Medjool dates are preferred for their rich sweetness and soft texture, contributing significantly to the binding of the energy balls. If using other date varieties, you may need to adjust the quantity slightly, possibly adding a tablespoon or two more to achieve the desired consistency. Ensure your dates are pitted thoroughly to avoid any unpleasant surprises.
Rolled Oats: 1 cup (certified gluten-free if needed). Rolled oats provide fiber, which aids digestion and contributes to a satisfying, filling snack. Using quick-cooking oats or steel-cut oats will alter the texture; rolled oats offer the best balance of chewiness and ease of preparation. Consider using certified gluten-free oats if you have any gluten sensitivities or dietary restrictions.
Peanut Butter (or other nut butter): ½ cup (natural, no added sugar). Peanut butter contributes healthy fats, protein, and a rich flavor. Opt for natural peanut butter without added sugar, salt, or hydrogenated oils for optimal health benefits. Other nut butters like almond butter, cashew butter, or sunflower seed butter can be substituted, keeping in mind that the flavor profile will change. Adjust the amount if needed based on the nut butter’s consistency; some are thicker than others.
Protein Powder: ¼ cup (whey, casein, soy, or plant-based). The protein powder adds a significant protein boost, increasing satiety and providing essential amino acids. Choose a protein powder that aligns with your dietary needs and preferences. Whey and casein are popular choices, but plant-based options like pea protein or brown rice protein offer excellent alternatives for vegans and vegetarians. Note that the type of protein powder may slightly affect the final texture.
Chia Seeds: 2 tablespoons. Chia seeds are a nutritional powerhouse, contributing fiber, omega-3 fatty acids, and antioxidants. They also help bind the ingredients and add a slightly chewy texture. You can substitute flax seeds if desired, but chia seeds offer a slightly milder flavor.
Cocoa Powder: 2 tablespoons (unsweetened). Unsweetened cocoa powder adds a rich chocolate flavor and a touch of bitterness that complements the sweetness of the dates. Avoid using Dutch-processed cocoa powder, as it can result in a flatter, less vibrant flavor. If you prefer a less intense chocolate flavor, reduce the amount to 1 tablespoon.
Optional additions: Consider adding ½ teaspoon of vanilla extract for enhanced flavor, a pinch of sea salt to enhance the sweetness, or a handful of chopped nuts (almonds, walnuts, pecans) for added crunch and texture. Remember to adjust the quantity of other ingredients if adding substantial extra ingredients to maintain the desired consistency.
Important Note: Always measure ingredients accurately for consistent results. If using a measuring cup, ensure you level off the ingredients to avoid adding too much of any one component.
Equipment List: Healthy Protein Energy Balls
Making healthy protein energy balls is a straightforward process, but having the right equipment on hand will significantly streamline the procedure and ensure a smoother, more efficient experience. This list details the essential tools, providing guidance on alternatives and emphasizing the importance of choosing the right tools for optimal results.
Food Processor or High-Powered Blender: This is arguably the most crucial piece of equipment. A food processor, particularly one with a strong motor, is ideal for processing the ingredients efficiently and achieving the desired texture. A high-powered blender can also work well, though you might need to process the ingredients in batches to avoid overloading the motor. Aim for a food processor with a minimum of 500-watt motor for optimal performance. If using a blender, a 1000-watt or higher blender is recommended.
Measuring Cups and Spoons: Accurate measurements are paramount in baking, and energy balls are no exception. Invest in a reliable set of measuring cups and spoons, preferably those made of stainless steel for durability and easy cleaning. Ensure you have a variety of sizes, including 1/4 cup, 1/3 cup, 1/2 cup, and 1 cup measuring cups, as well as 1/4 teaspoon, 1/2 teaspoon, 1 teaspoon, and 1 tablespoon measuring spoons. Using inaccurate measurements can impact the final texture and taste of your energy balls.
Mixing Bowls: You’ll need at least two mixing bowls of varying sizes. One larger bowl is ideal for combining the dry ingredients, while a smaller bowl can be used for mixing wet ingredients or for incorporating any add-ins such as chocolate chips or nuts. Choose bowls that are deep enough to prevent spills and large enough to comfortably accommodate the ingredients. Stainless steel or glass bowls are preferable for their durability and ease of cleaning.
Baking Sheet: A standard baking sheet is necessary for rolling and setting the energy balls. Lines the baking sheet with parchment paper to prevent sticking and make cleanup easier. Ensure the baking sheet is large enough to comfortably accommodate all the energy balls without overcrowding. A silicone baking mat can be used as an alternative to parchment paper.
Parchment Paper or Silicone Baking Mat: This is crucial for preventing the energy balls from sticking to the baking sheet during the setting process. Both parchment paper and silicone baking mats are excellent choices, offering easy cleanup and preventing sticking. Choose whichever option you find most convenient.
Measuring Scales (Optional but Recommended): While measuring cups and spoons are sufficient, a kitchen scale provides greater precision, particularly when working with ingredients requiring weight-based measurements, such as protein powder. A digital kitchen scale that measures in grams and ounces offers the most versatility.
Spatula or Scraper: A spatula or rubber scraper is essential for scraping down the sides of the food processor or bowl to ensure all ingredients are thoroughly incorporated. A silicone spatula is ideal as it is flexible and won’t scratch the bowl.
Optional Equipment: Depending on your recipe, you might also find it helpful to have a double boiler for melting chocolate or a small saucepan for heating liquids. A rolling pin (or your hands!) can be useful for shaping the energy balls if you prefer a uniform size and shape.
Preparation Phase: (includes washing/preparing ingredients)
The success of your healthy protein energy balls hinges on meticulous preparation. This phase ensures consistent texture, optimal flavor, and prevents any unpleasant surprises later on. We’ll be making a batch yielding approximately 12 energy balls, but you can easily scale this recipe up or down.
Begin by gathering all your ingredients. For this recipe, we’ll need: 1 cup rolled oats (certified gluten-free if needed), ½ cup pitted Medjool dates (ensure they are soft and pliable; if not, soak them in warm water for 10-15 minutes), ¼ cup unsweetened shredded coconut, 2 tablespoons chia seeds, 2 tablespoons peanut butter (or your preferred nut butter), 1 tablespoon cocoa powder (unsweetened), 1 teaspoon vanilla extract, and a pinch of sea salt.
Washing is crucial, especially for the oats and coconut. Although oats are typically processed, a quick rinse under cool running water removes any potential dust or debris. Similarly, rinse the shredded coconut to eliminate any loose fibers or stray pieces. Thoroughly drain both ingredients in a fine-mesh sieve before proceeding. This simple step significantly enhances the overall cleanliness and taste of your energy balls.
Now, let’s prepare the dates. Soft, pitted Medjool dates are ideal for this recipe because they provide natural sweetness and a creamy texture. If your dates are firm, soaking them in warm water for 10-15 minutes will soften them considerably, making them easier to blend. Once softened, thoroughly drain the dates and remove the pits. Make sure to remove all pits completely to avoid an unpleasant crunch in your finished product.
Next, measure out the remaining ingredients: chia seeds, peanut butter, cocoa powder, vanilla extract, and sea salt. Accuracy in measuring is important for achieving the desired consistency and flavor profile. Use measuring spoons and cups for precise measurements. If you’re using a nut butter that is particularly thick, you may need to gently warm it in the microwave for 10-15 seconds to make it more easily blendable. Be careful not to overheat it.
Once all ingredients are measured and prepared, you are ready to move on to the next stage – combining the ingredients. Having all ingredients prepped and ready will streamline the process and ensure a smooth transition to the next step. This organized approach will contribute to a more enjoyable and efficient cooking experience.
Remember to sanitize your work surfaces and utensils before beginning. This helps prevent bacterial contamination and ensures food safety. Food safety is paramount; always wash your hands thoroughly before and after handling ingredients.
Mixing Instructions
Creating perfectly textured and delicious Healthy Protein Energy Balls requires careful attention to the mixing process. Follow these instructions meticulously for optimal results. We recommend using a medium-sized mixing bowl and clean utensils for best hygiene and to avoid cross-contamination.
Step 1: Preparing the Dry Ingredients Begin by measuring out all your dry ingredients accurately. This includes 1 cup rolled oats (certified gluten-free if needed), ½ cup almond flour (or other nut flour of your choice), ¼ cup unsweetened shredded coconut, 2 tablespoons chia seeds, and 1 teaspoon cinnamon. Precise measurements are crucial for achieving the ideal consistency. Use a kitchen scale for the most accurate measurements, especially for the almond flour, as volume measurements can vary. Whisk these dry ingredients together thoroughly in your mixing bowl to ensure even distribution. This prevents clumping and ensures all the energy balls have a uniform flavor and texture.
Step 2: Combining the Wet Ingredients In a separate small bowl, prepare your wet ingredients. This involves combining ½ cup of your preferred nut butter (peanut butter, almond butter, or cashew butter work well), 2 tablespoons honey or maple syrup (adjust to your desired sweetness), 1 tablespoon of coconut oil (melted), and 1 teaspoon vanilla extract. Ensure the coconut oil is completely melted and liquid to facilitate smooth mixing. If using a solid nut butter, gently heat it in the microwave for a few seconds to make it easier to stir. Stir these ingredients until they are completely combined and form a smooth, homogenous paste.
Step 3: Combining Wet and Dry Ingredients Gradually add the wet ingredient mixture to the dry ingredients. Avoid adding all the wet ingredients at once, as this could result in a sticky, unmanageable mixture. Instead, add the wet ingredients in small increments, mixing thoroughly with a spoon or spatula after each addition. The goal is to combine the ingredients completely without overmixing. Overmixing can lead to tough energy balls.
Step 4: Achieving the Right Consistency The mixture should be moist and easily formable into balls, but not overly sticky or wet. If the mixture is too dry, add a teaspoon of water or more melted coconut oil at a time, mixing well after each addition. If the mixture is too wet, add a tablespoon of almond flour or rolled oats until you reach the desired consistency. The ideal consistency should allow you to easily roll the mixture into 1-inch balls without them sticking to your hands.
Step 5: Chill and Set (Optional) For firmer energy balls, you can refrigerate the mixture for at least 30 minutes before rolling them into balls. This allows the mixture to firm up, making it easier to handle and resulting in a more compact final product. This step is optional, but highly recommended for a better texture.
Step 6: Rolling the Energy Balls Once you have achieved the right consistency, roll the mixture into 1-inch balls using your hands or a small cookie scoop. Place the energy balls on a parchment-lined plate or tray. Ensure the balls are evenly sized for consistent taste and portion control.
Important Note: Always wash your hands thoroughly before handling food. Adjust the sweetness and other ingredients to your personal preference.
Rolling/Shaping the Energy Balls
Once your energy ball mixture is thoroughly combined and has reached the desired consistency (a slightly sticky, malleable dough), it’s time to roll and shape your energy balls. This process is crucial for achieving uniform size, aesthetic appeal, and consistent texture throughout your batch. The size and shape are entirely up to your preference, but we recommend aiming for bite-sized portions for easy consumption and portion control.
Begin by preparing your workspace. Lightly dust a clean surface with a non-stick powder, such as powdered sugar, unsweetened cocoa powder (if your recipe includes cocoa), or even finely shredded coconut. This prevents the mixture from sticking and makes rolling much easier. A silicone baking mat also works wonderfully. Avoid using flour, as it can alter the texture and flavor of your energy balls.
Portioning the mixture is key. The easiest way to ensure consistent sizing is to use a kitchen scale. For standard-sized energy balls (approximately 1 inch in diameter), aim for portions of around 1-1.5 ounces (28-42 grams) per ball. If you don’t have a scale, you can use a tablespoon or a cookie scoop to approximate the size. Remember that consistency is important, so try to make each portion as similar in size as possible.
Rolling techniques: There are several ways to shape your energy balls. The simplest method is to roll the portioned mixture between your palms, using a gentle, circular motion, until you achieve a smooth, round shape. For a more refined look, you can use your hands to create a slightly flattened disc. If you prefer a more rustic appearance, you can simply roll the mixture into a rough ball. Be mindful not to overwork the mixture, as this can make the energy balls dense and less enjoyable to eat.
Dealing with sticky mixtures: If your mixture is excessively sticky, even with the dusting powder, try chilling it in the refrigerator for 15-20 minutes. This will firm up the mixture, making it easier to handle. Alternatively, you can add a tablespoon or two of additional dry ingredients, such as oats, nuts, or seeds, to absorb the excess moisture. Always add dry ingredients gradually to avoid making the mixture too dry.
Creative shaping options: Don’t limit yourself to round balls! You can also use cookie cutters to create fun shapes, press them into silicone molds, or even roll them into logs and slice them into discs. Get creative and experiment with different shapes and sizes to personalize your energy balls. Remember to consider the ingredients when choosing a shaping method, as some ingredients may be less suitable for more intricate shapes.
Placement and chilling: Once shaped, place your energy balls on a parchment-lined plate or baking sheet. If you plan to coat them in additional ingredients like melted chocolate or nuts, do so after they’ve been rolled. For optimal texture, especially if using ingredients like nut butter that may become soft at room temperature, consider chilling the energy balls in the refrigerator for at least 30 minutes before serving or storing. This will help them firm up and prevent them from becoming too sticky.
Cooling and Setting
The cooling and setting process is crucial for achieving the perfect texture in your healthy protein energy balls. Improper cooling can result in sticky, messy balls that are difficult to handle, while insufficient setting time will leave them soft and prone to crumbling. This section details the best practices to ensure your energy balls are firm, delicious, and easy to enjoy.
Once you’ve thoroughly mixed all your ingredients and the mixture is a cohesive, pliable dough, it’s time to begin the cooling process. Refrigeration is key. Do not attempt to roll the energy balls immediately after mixing; the heat from the ingredients, especially nut butters, will prevent proper setting. The mixture needs time to chill and firm up.
Transfer the entire mixture into a shallow, airtight container. A wide, flat container is recommended, as this will promote even cooling. Avoid using a deep container, as this might prolong the cooling time and lead to uneven setting. Aim for a container approximately 1 to 2 inches deep, depending on the quantity of your mixture. Cover the container tightly with a lid or plastic wrap to prevent the mixture from absorbing any odors from the refrigerator.
Refrigerate the mixture for at least 30 to 60 minutes. This allows the ingredients to bind together and the mixture to firm up significantly. The exact cooling time will depend on the ambient temperature of your refrigerator and the specific ingredients used. For instance, recipes with a higher proportion of liquid ingredients might need slightly longer cooling time.
After the initial 30-60 minute cool-down period, check the consistency of the mixture. It should be significantly firmer and less sticky than when initially mixed. If it still seems too soft, refrigerate for another 15-30 minutes. It’s better to err on the side of caution and allow for a longer cooling period than to rush the process. Under-cooled mixtures will be difficult to roll into neat balls.
Once the mixture is firm enough to handle, you can proceed to roll it into balls. Use a tablespoon or a small cookie scoop to measure out consistent portions. Roll each portion gently between your palms to form a smooth, round ball. If the mixture is still slightly sticky, you can lightly wet your hands with cold water to prevent sticking. Avoid over-handling the mixture, as this can lead to the balls becoming too warm and losing their firmness.
After rolling, you can optionally place the energy balls on a baking sheet lined with parchment paper for further cooling and setting in the refrigerator. This will help prevent them from sticking together. Allow them to chill in the refrigerator for at least another 30 minutes before storing or consuming. This final chilling period ensures optimal firmness and prevents the balls from becoming too soft at room temperature.
Proper cooling and setting are essential for creating delicious, well-structured energy balls. By following these steps, you can ensure your healthy protein energy balls are a perfect, satisfying snack.
Healthy Protein Energy Balls: Recommendations
These delicious and nutritious Healthy Protein Energy Balls are perfect for a quick and healthy snack or a pre- or post-workout boost. Each energy ball provides approximately 200 calories, 10g of protein, 20g of carbohydrates, and 8g of healthy fats. Nutritional values may vary slightly depending on specific ingredients used. For detailed nutritional information based on your specific recipe, we recommend using a nutrition calculator.
Serving Suggestions: These energy balls are incredibly versatile. Enjoy them as a standalone snack, perfect for curbing hunger pangs between meals. They are also ideal for pre- or post-workout fuel, providing sustained energy without the sugar crash. For a more decadent treat, chill them slightly before serving for a firmer texture. You can also add a sprinkle of your favorite toppings like shredded coconut, chopped nuts, or cacao nibs for extra flavor and texture.
Storage Conditions: For optimal freshness and to maintain the quality of the ingredients, store your Healthy Protein Energy Balls in an airtight container in the refrigerator. They will keep well for up to 5 days in the refrigerator. For longer storage, you can freeze them. Place the energy balls in a freezer-safe container or bag and freeze for up to 3 months. To thaw, simply remove a few balls from the freezer and let them sit at room temperature for about 15-20 minutes before enjoying.
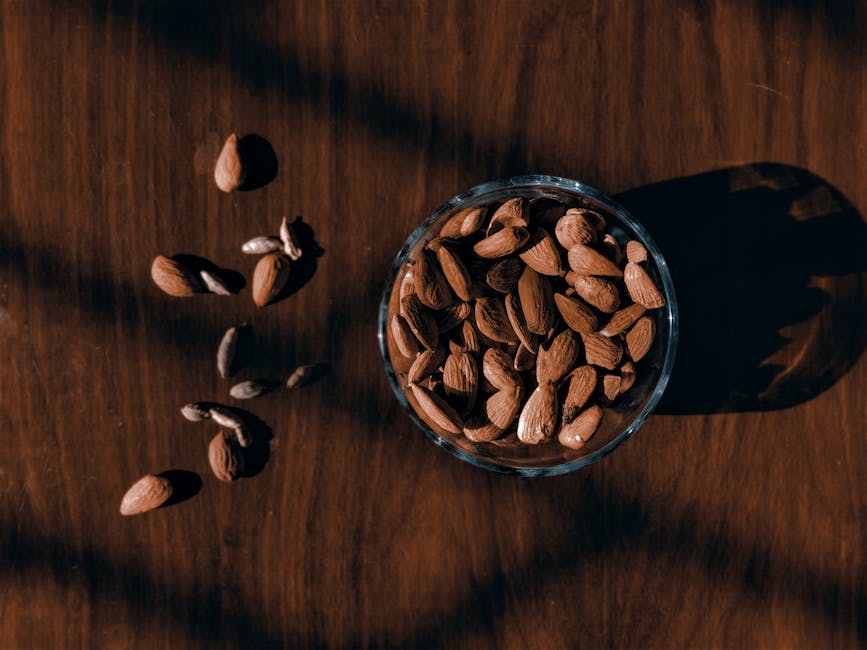
Complementary Dishes: The versatility of these energy balls extends beyond just a standalone snack. They pair beautifully with a variety of other foods and drinks. Consider serving them alongside a cup of herbal tea or a refreshing smoothie for a balanced and satisfying meal or snack. They also complement yogurt parfaits, adding a delightful chewy texture and boost of protein. They can be incorporated into breakfast bowls, adding a layer of flavor and energy to your morning routine. For a more substantial post-workout meal, pair them with a serving of fruit and a small portion of lean protein, such as Greek yogurt or a handful of almonds.
Important Considerations: While these energy balls are healthy and nutritious, it’s important to be mindful of portion sizes. Overconsumption, even of healthy foods, can lead to weight gain. Adjust the recipe and serving sizes to meet your individual dietary needs and calorie goals. Also, be mindful of any potential allergies or intolerances you may have and adjust the ingredients accordingly. If you have any specific dietary concerns or restrictions, it’s always advisable to consult with a registered dietitian or healthcare professional.
Enjoy your Healthy Protein Energy Balls! We hope you find them to be a delicious and convenient addition to your healthy lifestyle.