The aroma of freshly baked pretzels, their crust glistening with a salty sheen, is a sensory experience deeply rooted in German culture. These iconic treats, known as Brezel or Breze in German, boast a history stretching back centuries, their origins shrouded in a fascinating blend of legend and historical fact. While pinpointing their exact birthplace remains elusive, evidence points towards Southern Germany and Austria, with some theories suggesting monastic bakeries may have played a pivotal role in their early development. One popular legend links the pretzel’s shape to crossed arms, symbolizing prayer, possibly dating back to the 6th century. Other accounts trace its form to the clasped hands of children, or even to the folded arms of a baker.
The pretzel’s journey through time is marked by significant cultural milestones. Initially a simple bread, pretzels evolved over centuries, incorporating the characteristic lye bath that gives them their distinctive deep brown color and chewy texture. This process, unique to pretzel making, is believed to have originated in the Middle Ages. Throughout history, pretzels have held various symbolic meanings. They were frequently associated with religious events, appearing in church celebrations and festivals. In some regions, pretzels were even given to children as rewards, further cementing their place in everyday life. Their popularity extended beyond regional boundaries, eventually becoming a globally recognized symbol of German cuisine.
Today, the pretzel’s cultural significance remains strong. It’s not just a snack; it’s an integral part of numerous traditions and celebrations. In Germany alone, the annual consumption of pretzels is staggering, with estimates exceeding billions annually. Beyond Germany, pretzels have become a beloved food item worldwide, appearing in various forms, from soft pretzels sold on street corners to the hard, crunchy versions enjoyed as snacks. Their adaptability speaks volumes about their enduring appeal. The simple yet satisfying combination of chewy texture, salty flavor, and slightly sweet undertones continues to capture the hearts (and stomachs) of people across the globe. This enduring popularity is a testament to the pretzel’s rich history and its ability to transcend cultural boundaries, remaining a timeless treat for generations to come.
Ingredients and Measurements
Creating authentic German pretzels requires precise measurements and high-quality ingredients. The success of your pretzels hinges on the balance of these components, so take your time and measure accurately.
For the Dough, you will need:
- 1 cup (240ml) lukewarm water (approximately 105-115°F): The temperature is crucial for activating the yeast. Too hot, and you’ll kill it; too cold, and it won’t activate properly. Use a thermometer to ensure accuracy.
- 2 ¼ teaspoons (7 grams) active dry yeast (or 1 packet): Fresh yeast is preferable, but active dry yeast works well too. Ensure your yeast is still viable by checking the expiration date.
- 1 tablespoon (15ml) granulated sugar: This provides food for the yeast and contributes to the browning and flavor of the pretzels.
- 1 teaspoon (5ml) salt: Salt controls the yeast activity and enhances the flavor. Don’t skimp on this; it’s essential for balance.
- 4 cups (500g) all-purpose flour, plus more for dusting: Start with 4 cups, but be prepared to add a little more, one tablespoon at a time, until the dough reaches the right consistency. The amount might vary slightly depending on the humidity and the type of flour.
- ½ cup (120ml) unsalted butter, melted: Melted butter adds richness and tenderness to the dough. Let the butter cool slightly before adding it to avoid killing the yeast.
For the Pretzel Bath, you will need:
- 8 cups (1.9 liters) water: Use filtered or bottled water to avoid any potential mineral interference with the lye solution.
- ¼ cup (60g) baking soda (sodium bicarbonate): This is crucial for creating the characteristic dark brown crust and chewy texture of German pretzels. Do not substitute baking powder.
For the Topping, you will need:
- Coarse sea salt: This adds a salty crunch to the pretzels. Avoid using fine table salt, as it will dissolve and disappear.
Important Notes:
Accuracy is paramount: Use a kitchen scale for the most precise measurements, especially for the flour and yeast. Volume measurements can be unreliable.
Fresh ingredients are key: Using fresh yeast and high-quality flour will significantly impact the final product.
Adjustments might be needed: Depending on the humidity and flour type, you may need to adjust the flour quantity slightly. The dough should be soft and slightly sticky, but not overly wet.
Safety first: When handling the baking soda solution, wear gloves to protect your hands. The solution is alkaline and can be irritating.
Equipment List
Making homemade German pretzels requires a specific set of equipment to ensure optimal results. While some items might seem interchangeable, choosing the right tools will significantly impact the final product’s texture, shape, and overall appearance. Below is a detailed list of the necessary equipment, along with practical recommendations and justifications for each item.
Large Mixing Bowls (2): You’ll need at least two large mixing bowls, preferably stainless steel or glass. One bowl will be used for mixing the dough, and the second for the lye solution (or baking soda solution, if using an alternative method). Aim for bowls with a capacity of at least 6 quarts (5.7 liters) to comfortably accommodate the dough. Avoid using reactive metals like aluminum, as they can affect the dough’s chemistry.
Stand Mixer with Dough Hook Attachment (Highly Recommended): While you can knead the dough by hand, a stand mixer with a dough hook attachment significantly simplifies the process and ensures thorough kneading. This results in a smoother, more elastic dough, crucial for achieving that characteristic pretzel chewiness. If using a hand mixer, be prepared for a vigorous workout! A 5-quart or larger stand mixer is ideal.
Measuring Cups and Spoons: Accurate measurements are vital in baking. Invest in a set of reliable measuring cups and spoons, preferably those made of stainless steel or durable plastic. Avoid using worn-out or inaccurate measuring tools. Precision in measuring the yeast, salt, and other ingredients directly influences the dough’s rise and overall flavor.
Kitchen Scale (Recommended): While volume measurements are sufficient for some ingredients, weighing ingredients, especially flour, provides greater accuracy. A kitchen scale ensures consistent results from batch to batch, minimizing variations caused by differences in flour density or measuring techniques. A digital kitchen scale is preferred for its precision.
Large Pot (for Lye Solution): If you’re using a lye solution (which is traditional and yields the best results), you’ll need a large pot, preferably stainless steel, to prepare it. Always exercise extreme caution when working with lye. Wear protective gloves and eye protection, and ensure the pot is thoroughly cleaned afterwards. A 4-quart (3.8-liter) pot should be sufficient.
Baking Sheet(s): You’ll need at least one large baking sheet, preferably non-stick, to bake the pretzels. Larger baking sheets are better for accommodating multiple pretzels simultaneously. Using parchment paper on the baking sheet is highly recommended to prevent sticking and make cleanup easier. Consider two baking sheets if you’re making a large batch.
Pastry Brush: A pastry brush is essential for applying the lye (or baking soda) solution evenly to the pretzels before baking. Choose a brush with sturdy bristles that can withstand the alkaline solution.
Large Plastic Container or Ziploc Bags (for dough rising): You’ll need a large container to hold the dough while it rises. A food-safe plastic container or several large Ziploc bags work well. Ensure the container is large enough to allow the dough to double in size.
Sharp Knife or Pizza Cutter: To score the pretzels – a sharp knife or pizza cutter allows for clean, even cuts, which helps with the characteristic pretzel appearance and even baking.
Preparation of the Dough (including kneading and proofing)
The foundation of any great German pretzel lies in its dough. This section details the process of creating a perfectly balanced dough, focusing on achieving the right texture and elasticity for optimal pretzel formation.
We’ll begin with the ingredients: 1 cup (240ml) lukewarm water (around 105-115°F), 1 teaspoon (4g) granulated sugar, 2 teaspoons (4g) active dry yeast, 4 cups (500g) all-purpose flour, plus more for dusting, 1 tablespoon (15g) unsalted butter, softened, 1 teaspoon (5g) salt. Precise measurements are crucial for achieving the ideal dough consistency.
In a large bowl, combine the lukewarm water, sugar, and yeast. Let this mixture stand for about 5-10 minutes until foamy. This confirms the yeast is active and ready to work its magic. If it doesn’t foam, your yeast might be dead and you’ll need to start again with fresh yeast.
Once the yeast is activated, add the softened butter to the mixture and stir until it’s mostly incorporated. Then, gradually add the flour, one cup at a time, mixing with a wooden spoon or spatula. Don’t add all the flour at once; you might end up with a stiff dough that’s difficult to knead. Once you’ve incorporated as much flour as possible with the spoon, it’s time to move on to kneading.
Turn the dough out onto a lightly floured surface. Knead the dough for 8-10 minutes. This is a crucial step, developing the gluten structure that gives pretzels their characteristic chewiness. The dough should become smooth and elastic, passing the windowpane test (you should be able to stretch a small piece of dough thin enough to see light through it without it tearing). If the dough is too sticky, add a tablespoon of flour at a time until it becomes manageable. If it’s too dry, add a teaspoon of water at a time.
Once kneaded, place the dough in a lightly oiled bowl, turning to coat it. Cover the bowl with plastic wrap and let it rise in a warm place for 1-1.5 hours, or until doubled in size. This is the first proofing stage, allowing the yeast to ferment and give the dough its volume and flavor. Avoid drafts and direct sunlight during proofing, as these can affect the rising process.
After the first rise, gently punch down the dough to release the air. This is important to prevent large air pockets in the final pretzels. You’re now ready to shape your pretzels and proceed to the next stage.
Important Note: The proofing time can vary depending on the ambient temperature. A warmer room will result in faster proofing, while a cooler room will require a longer time. Always check the dough’s volume to determine its readiness. It should be noticeably increased and light and airy to the touch.
Shaping the Pretzels
Shaping pretzels might seem daunting at first, but with a little practice, you’ll be twisting them like a pro! The key is to work quickly and efficiently, as the dough can become difficult to handle if it gets too dry. Keep a bowl of cold water nearby for lightly wetting your hands – this prevents the dough from sticking excessively.
Begin by dividing your risen dough (approximately 1.2 kg or 2.6 lbs after the first rise) into 8 equal pieces. Each piece should weigh roughly 150g (5.3 oz). Roll each piece into a long, roughly 24-inch (60cm) rope, using the palms of your hands. Avoid too much flour, as this will dry the dough. A lightly floured surface will suffice.
To shape the classic pretzel, form a U-shape with the rope. Bring both ends of the U together, crossing them over each other and pressing gently to seal the join. Then, press the crossed ends onto the bottom of the U, just above the curve. This creates the classic knot. Ensure the ends are firmly pressed to prevent them from coming apart during baking.
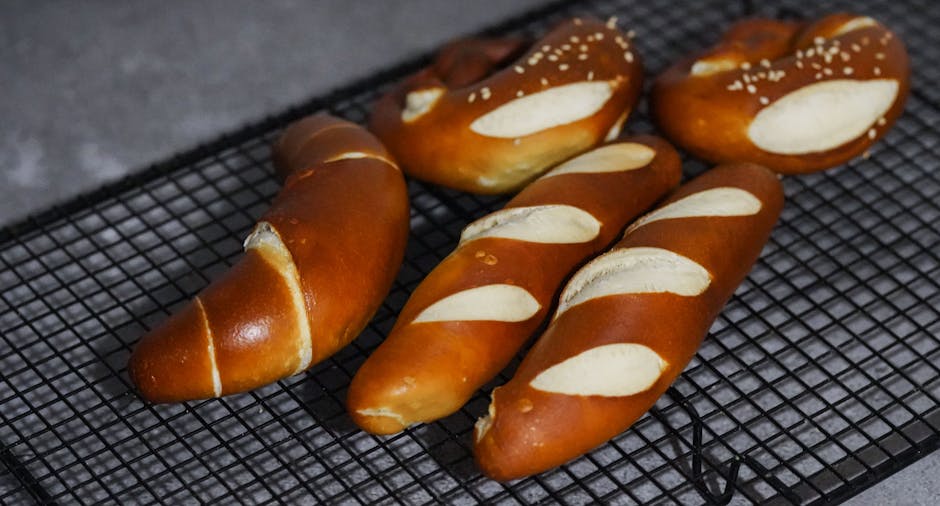
For a more rustic look, you can try a slightly different approach. Instead of a clean U-shape, make a looser, more organic curve. Bring the ends together, twisting them around each other once or twice before pressing them onto the bottom of the curve. This method allows for a more irregular, artisanal appearance.
Consistency is key for even baking. Strive to make all pretzels approximately the same size and shape. This ensures uniform cooking and a visually appealing final product. If you find some pieces are sticking, gently wet your hands again. Avoid excessive handling, which can toughen the dough.
Once all the pretzels are shaped, carefully transfer them to a baking sheet lined with parchment paper. Leave some space between each pretzel to allow for expansion during baking. Avoid overcrowding the baking sheet, as this will hinder proper browning and lead to unevenly cooked pretzels.
Before baking, it’s crucial to give the pretzels an alkaline bath. This is what gives German pretzels their distinctive deep brown color and chewy texture. Prepare a solution of 10 cups (2.4 litres) of water and 1/4 cup (50g) of baking soda. Gently submerge each pretzel in the solution for 30 seconds, turning to ensure even coverage. This process is essential and shouldn’t be skipped! Remove the pretzels, let the excess solution drip off, and then place them back on the prepared baking sheet.
Finally, you’re ready to bake! Remember to preheat your oven according to the recipe’s instructions. Enjoy the process of shaping your pretzels, and remember that practice makes perfect. With each batch, you’ll become more comfortable and efficient, resulting in beautifully shaped homemade German pretzels.
Boiling the Pretzels (Alkaline Bath Explanation)
The crucial step in achieving that signature chewy interior and deep brown, glossy exterior on your homemade German pretzels is the alkaline bath. This isn’t just about cooking the pretzels; it’s a chemical reaction that dramatically impacts both texture and color. We’re creating a solution of baking soda and water, which is slightly alkaline, and this bath is what transforms simple dough into those iconic pretzels.
The baking soda, when dissolved in hot water, creates a slightly alkaline environment (a higher pH). This alkaline solution interacts with the proteins in the pretzel dough during the brief boil. This interaction causes the surface of the pretzel to become more firm and develops a rich, mahogany brown color upon baking. Without this step, you’ll get bland, pale pretzels that lack that characteristic pretzel chew.
For a batch of pretzels made from a typical recipe (yielding about 8-12 pretzels depending on size), you’ll need a large pot – at least 6 quarts – filled with approximately 6 cups of water. Bring this water to a rolling boil on your stovetop. Then, add 1/4 cup (approximately 50 grams) of baking soda. Stir continuously until the baking soda is completely dissolved. The solution will become slightly cloudy.
Important Note: Be careful when adding the baking soda to the boiling water; it will fizz and might splatter. It’s best to add it slowly and stir constantly to prevent burns. Once the baking soda is fully dissolved, reduce the heat to a gentle simmer. This prevents the water from boiling too vigorously and potentially damaging your delicate pretzel shapes.
Gently place your shaped pretzels into the simmering alkaline bath, making sure not to overcrowd the pot. Working in batches is recommended to ensure even cooking and to avoid lowering the water temperature too significantly. Submerge each pretzel completely for 30-60 seconds per side. Don’t boil them for too long! Longer boiling times can lead to overly chewy, sometimes rubbery, pretzels. The goal is to create a beautiful crust and enhance the browning during baking, not overcook the dough.
Once you’ve boiled each side, carefully remove the pretzels using a slotted spoon or tongs and place them on a baking sheet lined with parchment paper. Immediately sprinkle them with coarse sea salt while they’re still damp from the bath. The salt will adhere better to the slightly wet surface. Now, your pretzels are ready for the oven. The alkaline bath has done its job – transforming simple dough into the golden-brown, chewy perfection that defines the German pretzel.
Professional Tip: For an extra-rich brown color, consider adding a tablespoon of brown sugar to the baking soda solution. The sugar contributes to the Maillard reaction, further enhancing the browning process during baking.
Baking the Pretzels (Oven Temperature and Time)
Baking your homemade German pretzels is the final, crucial step in achieving that perfect golden-brown crust and soft, chewy interior. Getting the oven temperature and baking time right is paramount for success. While seemingly simple, several factors can influence the ideal baking parameters, so careful attention to detail is key.
Preheat your oven to 450°F (232°C). This high temperature is essential for creating that characteristic pretzel crust. A lower temperature will result in a pale, softer pretzel that lacks the desirable crispness. Ensure your oven is fully preheated before placing the pretzels inside. Use an oven thermometer to verify the accuracy of your oven’s temperature setting, as ovens can sometimes vary.
Baking time is typically 12-15 minutes, but this can fluctuate depending on the size of your pretzels and the specific characteristics of your oven. Smaller pretzels will bake faster than larger ones. Begin checking for doneness at the 12-minute mark. The pretzels should be a deep golden brown, almost mahogany in color. The bottom should be a rich brown as well, indicating thorough baking.
Look for signs of doneness beyond just color. Gently press the top of a pretzel; it should sound hollow when tapped. This indicates that the interior is cooked through. If the pretzels are still soft or pale, continue baking in 1-minute increments until they reach the desired level of browning and firmness. Overbaking, however, can lead to dry, hard pretzels, so it’s crucial to monitor them closely during the final minutes of baking.
Consider using parchment paper or a baking sheet with a silicone liner. This will prevent the pretzels from sticking to the baking surface and make for easier cleanup. Do not overcrowd the baking sheet. Leave some space between the pretzels to allow for even heat circulation and browning. Overcrowding can lead to uneven baking and steam buildup, resulting in soggy pretzels.
For extra crispiness, you can add a final spritz of water to the pretzels before baking. This will create a slight steam effect in the oven, contributing to a crispier exterior. However, this is optional, and many bakers achieve excellent results without it.
Remember that ovens vary. The first batch might require minor adjustments to the baking time. Take notes on your findings—the size of pretzels, your oven’s quirks, and the optimal baking time for your setup—so you can consistently achieve perfect pretzels in future batches. Don’t be discouraged if your first attempt isn’t perfect; practice makes perfect when it comes to baking!
Once baked, immediately remove the pretzels from the oven and transfer them to a wire rack to cool. This allows air to circulate around the pretzels, preventing them from becoming soggy from trapped moisture. Allow them to cool completely before serving or storing.
Recommendations for Homemade German Pretzels
Your freshly baked homemade German pretzels are sure to be a hit! To ensure you get the most enjoyment out of them, follow these recommendations for serving, storage, and pairing with complementary dishes.
Serving Suggestions: These pretzels are delicious on their own, but their versatility allows for many creative serving options. For a classic experience, serve them warm, straight from the oven, with a generous sprinkling of coarse sea salt. You can also offer a variety of dipping sauces alongside, such as mustard (both sweet and spicy varieties are excellent), beer cheese sauce, or even a simple honey-mustard glaze. For a more decadent treat, consider serving them with a side of creamy butter or flavored butters such as garlic herb or brown sugar cinnamon.
Storage Conditions: For optimal freshness and texture, it’s best to consume your pretzels within a day or two of baking. To store them properly, allow them to cool completely before storing. You can store them in an airtight container at room temperature for up to 2 days. For longer storage (up to a week), you can freeze them. Wrap them individually in plastic wrap, then place them in a freezer bag. To reheat, simply warm them in a preheated oven at 350°F (175°C) for 5-7 minutes, or until heated through.
Complementary Dishes: German pretzels pair beautifully with a variety of dishes, making them a perfect addition to any meal or gathering. They are a fantastic accompaniment to hearty soups like German potato soup or creamy mushroom soup. Their salty flavor also complements rich, savory dishes such as Oktoberfest-style sausages, roasted pork, or a creamy chicken pot pie. For a lighter pairing, try serving them alongside a fresh salad with a vinaigrette dressing. The pretzels’ soft interior and crisp exterior offer a delightful textural contrast to the crisp greens and tangy dressing.
Nutritional Information (Approximate per pretzel, serving size may vary): The nutritional content of your pretzels will depend on the specific recipe and ingredients used. However, a medium-sized pretzel will likely contain approximately 250-350 calories. This includes a significant amount of carbohydrates from the flour, some protein from the yeast and egg (if used), and moderate amounts of fat depending on the type of butter or oil used. The nutritional breakdown will vary but generally includes a high carbohydrate content, moderate protein, and varying amounts of fat. Please note: This is an estimate and actual values may differ. For precise nutritional information, use a nutrition calculator with your specific recipe ingredients and measurements.
Important Note: While delicious, pretzels are relatively high in carbohydrates and sodium. Enjoy them in moderation as part of a balanced diet.