The seemingly simple act of perfectly boiling an egg belies a surprisingly rich history and global significance. While pinpointing the exact origin is impossible, evidence suggests that humans have been consuming eggs – and likely boiling them – for millennia. Archaeological findings indicate that egg consumption dates back to the Neolithic period, with eggshells discovered in ancient settlements providing evidence of early culinary practices. The precise method of hard-boiling likely evolved gradually, with techniques refined over centuries based on available resources and cultural preferences. Initially, boiling might have been a simple method of preservation, extending the shelf life of eggs in the absence of refrigeration. This basic technique, however, became a cornerstone of countless cuisines worldwide.
Hard-boiled eggs transcended mere sustenance and evolved into a culinary staple across diverse cultures. In many parts of the world, they are a quintessential breakfast food, a quick and nutritious start to the day. Globally, the annual consumption of eggs is staggering, reaching billions upon billions annually, a testament to their enduring popularity. In some cultures, hard-boiled eggs hold symbolic meaning. For instance, they feature prominently in Easter celebrations in numerous countries, representing new life and rebirth. The vibrant colors often associated with Easter eggs showcase the egg’s adaptability to culinary creativity, extending beyond a simple boiled state to elaborate decorations and symbolic presentations.
The seemingly straightforward process of achieving the perfect hard-boiled egg – with a firm yet tender yolk and easily peelable shell – is actually a surprisingly nuanced skill. Numerous methods exist, each with fervent advocates, from simmering in cold water to using ice baths to facilitate peeling. Even the age of the eggs can impact the ease of peeling, with older eggs often peeling more readily due to the separation of the membrane from the shell. This seemingly simple culinary task reflects a broader human fascination with mastering seemingly mundane processes, from the perfectly poached egg to the flawlessly baked loaf of bread. The quest for the perfect hard-boiled egg underscores our innate desire for precision and perfection in the kitchen, a pursuit that connects us across cultures and generations.
Beyond their culinary applications, hard-boiled eggs also boast significant nutritional value. They are an excellent source of protein, essential for building and repairing tissues, and are rich in vitamins and minerals, including choline, which plays a vital role in brain health. Studies have shown that regular egg consumption can contribute to a balanced diet and overall well-being. From a humble breakfast staple to an Easter symbol, the humble hard-boiled egg’s journey through history and its continued global presence highlights its enduring appeal and undeniable significance in human culinary history and culture.
Ingredients: The Foundation of a Perfect Hard-Boiled Egg
While the ingredient list for hard-boiled eggs might seem deceptively simple – it’s essentially just eggs – the quality of your starting ingredient significantly impacts the final result. Choosing the right eggs and understanding their properties is the first step towards achieving that perfect hard-boiled egg every time. Don’t underestimate the importance of this seemingly straightforward step!
The Star of the Show: Large Eggs (Quantity: As needed)
We recommend using large eggs for consistency. Smaller or extra-large eggs will require slight adjustments in cooking time, leading to potential overcooking or undercooking. Large eggs provide a good balance of yolk size and white firmness. Always check the expiration date on your carton to ensure freshness. Fresh eggs are crucial for preventing a green ring around the yolk, a common problem in older eggs. The fresher the egg, the tighter the protein bonds, leading to a cleaner, more appealing result.
Optional Additions for Enhanced Flavor (Quantities: To taste)
While not strictly necessary, adding certain ingredients during the cooking process can subtly enhance the flavor profile of your hard-boiled eggs. Consider these options:
- Salt (1/2 teaspoon per dozen): Adding a pinch of salt to the boiling water helps to season the eggs subtly and also slightly tightens the egg whites, leading to a firmer texture. Don’t overdo it, as excessive salt can make the eggs taste overly salty.
- Vinegar (1 tablespoon per dozen): A tablespoon of white vinegar or apple cider vinegar added to the boiling water can help prevent cracks in the eggshells during cooking. The acid helps to coagulate the egg whites more quickly, sealing any tiny cracks that might form.
- Bay Leaves (1-2 per dozen): For a hint of aromatic complexity, adding a couple of bay leaves to the water can infuse a subtle savory note into the eggs. Remember to remove the bay leaves before serving.
Water (Quantity: Enough to cover the eggs completely)
Use enough cold water to completely submerge the eggs in the pot. This ensures even heating and prevents the eggs from sticking to the bottom of the pan and cracking. Avoid overcrowding the pot; leave enough space between the eggs for proper water circulation.
Ice Bath (Quantity: Enough to completely cool the eggs)
This is a crucial step often overlooked. Immediately after boiling, transferring the eggs to an ice bath stops the cooking process and prevents the yolks from continuing to cook and turning green. A quick ice bath also makes peeling much easier. Ensure the ice bath is large enough to fully immerse the eggs and allow them to cool completely.
Equipment
Making perfect hard-boiled eggs relies not just on technique, but also on the right equipment. While you can certainly achieve decent results with basic kitchen tools, investing in a few key items will significantly improve consistency and ease the process. Let’s explore the essential and optional equipment you’ll need.
1. A Pot: You’ll need a saucepan, ideally one with a heavy bottom and a tight-fitting lid. A heavy bottom prevents scorching, ensuring even heat distribution throughout the cooking process. The size of the pot should be appropriate for the number of eggs you’re cooking; overcrowding will lead to uneven cooking and potentially cracked eggs. Aim for a pot that allows the eggs to sit in a single layer with at least an inch of water covering them.
Recommended Pot Size: For 6-12 eggs, a 2-quart saucepan is ideal. For larger batches, consider a larger capacity pot.
2. Eggs: The quality of your eggs significantly impacts the final result. Use fresh, preferably room-temperature eggs. Room temperature eggs cook more evenly and are less likely to crack during the cooking process. If using cold eggs straight from the refrigerator, gently lower them into the simmering water to reduce the risk of cracking.
3. Slotted Spoon or Spider: This is crucial for gently removing the eggs from the boiling water. A slotted spoon allows water to drain away, preventing further cooking and making handling safer. A spider, with its fine mesh, offers even better control, especially for smaller eggs.
4. Ice Bath Container: An ice bath is essential for stopping the cooking process immediately after boiling. This prevents further cooking and creates an easier-to-peel egg. Use a large bowl or container that can comfortably hold the eggs and enough ice water to fully submerge them. A colander placed inside the bowl can help with easy retrieval of the eggs.
5. Timer: Precise timing is key to achieving the perfect hard-boiled egg. A kitchen timer is essential to ensure consistent cooking time and prevent overcooking or undercooking. Digital timers are particularly helpful as they provide accurate readings.
Optional Equipment:
1. Egg Piercer: An egg piercer creates tiny holes in the wider end of the egg before boiling. This helps release steam pressure during cooking, reducing the likelihood of cracking. While not strictly necessary, it can be beneficial, especially for beginners.
2. Egg Separator: If you plan to use the egg whites and yolks separately, an egg separator will make the task much easier and cleaner.
3. Cooling Rack: After the ice bath, allowing the eggs to air dry on a cooling rack can help prevent sticking and improve the overall peeling experience.
By gathering these essential pieces of equipment, you’ll be well-prepared to create consistently perfect hard-boiled eggs every time. Remember, proper equipment combined with the right technique guarantees delicious results.
Instructions
Achieving the perfect hard-boiled egg involves more than just dropping eggs into boiling water. Follow these detailed instructions for consistently excellent results, every time. The key is gentle handling and precise timing.
Step 1: Preparation is Key. Begin by selecting eggs that are as fresh as possible. Older eggs tend to have a looser, more easily-peelable membrane, but they can also become rubbery. Ideally, use eggs that are 5-7 days old. Gently wash the eggs under cold running water to remove any dirt or debris. Do not crack the eggs at this stage.
Step 2: Gentle Placement. Place the eggs in a single layer in a medium-sized saucepan. Avoid overcrowding the pan, as this can lead to uneven cooking and cracking. Add enough cold water to completely cover the eggs by about an inch. This is crucial for even heat distribution.
Step 3: Bringing the Water to a Boil. Place the saucepan over medium-high heat. Bring the water to a rolling boil. Once boiling, immediately remove the saucepan from the heat. This is a critical step to prevent cracking and ensure a perfectly cooked yolk.
Step 4: Precise Timing for Perfect Results. Cover the saucepan with a lid and let the eggs sit in the hot water for the desired cooking time. The cooking time determines the consistency of the yolk:
- 6 minutes: Runny yolk, perfect for deviled eggs or egg salad where a softer yolk is desired.
- 8 minutes: Slightly jammy yolk, a good balance between runny and firm.
- 10 minutes: Firm yolk, ideal for slicing and serving in salads or sandwiches.
- 12+ minutes: Very firm yolk, suitable for longer storage or recipes requiring a fully cooked egg.
Note: Cooking times may vary slightly depending on the size of your eggs and your stovetop. It’s always best to start with the shorter time and adjust as needed.
Step 5: Icing Bath for Easy Peeling. After the cooking time is complete, immediately transfer the eggs to a bowl filled with ice water. This stops the cooking process and helps create a gap between the egg white and shell, making peeling significantly easier. Allow the eggs to sit in the ice bath for at least 10 minutes.
Step 6: Peeling with Precision. Once cooled, gently tap the eggs all over on a hard surface to create cracks in the shell. Start peeling the egg under cold running water. The water helps loosen the membrane further. Peel carefully to avoid tearing the egg white. If the egg is difficult to peel, it likely indicates that it wasn’t cooked properly or the ice bath wasn’t long enough.
Step 7: Storage and Serving. Store peeled hard-boiled eggs in an airtight container in the refrigerator for up to one week. They are delicious on their own, in salads, sandwiches, or as a component in many other dishes. Enjoy!
Professional Recommendation: For perfectly uniform hard-boiled eggs, consider using an egg cooker. These appliances are designed to cook eggs consistently, minimizing the risk of cracking and ensuring even cooking.
Cooking Time & Doneness
Achieving the perfect hard-boiled egg hinges on precise cooking time. Overcook them, and you’ll end up with a dry, crumbly yolk; undercook them, and the yolk will be runny. The ideal cooking time depends on the size of your eggs and your preferred yolk consistency. We’ll explore various options to help you find your sweet spot.
Egg Size Matters: Larger eggs require slightly longer cooking times than smaller eggs. This is because the larger volume needs more time to reach the desired internal temperature throughout. For consistency, it’s best to use eggs of the same size in a single batch.
Timing Guide (for large eggs): This guide provides a starting point. Adjust cooking times based on your stove and preferred yolk texture. Always start with the shorter time and add increments of 30 seconds until you achieve your desired doneness.
| Cooking Time (minutes) | Yolk Consistency |
|---|---|
| 6 | Very runny yolk, almost like a poached egg. |
| 7 | Runny yolk, ideal for egg salad sandwiches where some runniness is desired. |
| 8 | Slightly runny yolk, good for deviled eggs with a creamy center. |
| 9-10 | Perfectly set yolk, creamy but not runny. This is generally the ideal cooking time for most uses. |
| 11-12 | Firm yolk, slightly dry but still good for many applications. |
| 13+ | Very firm, possibly dry and crumbly yolk. Avoid this for best results unless specifically needed for a certain recipe. |
Cooking Method: While boiling is the most common method, steaming eggs can produce a slightly more even cook. Gently lower eggs into a steamer basket set over simmering water, ensuring they aren’t touching each other. Cooking times will be similar to boiling, but you may need to add a minute or two to account for the different heat transfer.
The Ice Bath: Immediately after cooking, transfer the eggs to an ice bath (a bowl of ice water). This stops the cooking process and prevents the yolks from continuing to cook and becoming overly firm or green around the edges. This step is crucial for achieving a vibrant yellow yolk and easy peeling. Let them sit in the ice bath for at least 5 minutes.
Testing for Doneness (without breaking the egg): While the chart provides a guideline, the best way to ensure perfect doneness is to test an egg after the shorter time in your range. Gently roll the egg on a flat surface; if it spins freely, it is cooked completely through. If it wobbles, it requires more cooking time.
Professional Recommendation: Start with the shorter end of the recommended cooking time range and adjust in 30-second increments until you achieve your desired yolk consistency. Keep in mind that altitude can affect cooking times, so you might need to adjust slightly if you live at a high elevation.
Remember: Practice makes perfect! Don’t be discouraged if your first batch isn’t exactly as you envisioned. Experiment with different cooking times and methods to find the perfect hard-boiled egg for your taste and culinary needs.
Cooling and Peeling: The Key to Perfect Hard-Boiled Eggs
The cooling and peeling stages are crucial for achieving perfectly smooth, easily peelable hard-boiled eggs. Improper cooling can lead to stubbornly clinging shells, while rushing the process can result in cracked eggs and a frustrating experience. Follow these steps for consistently flawless results.
Immediate Ice Bath: As soon as the eggs are finished boiling, immediately transfer them to a bowl filled with ice water. Use enough ice to completely submerge the eggs. This rapid cooling process halts the cooking process, preventing further cooking that can lead to a greenish ring around the yolk and make peeling more difficult. Let the eggs sit in the ice bath for at least 10-15 minutes, or until completely cool to the touch. This is a critical step; don’t skip it!
Gentle Handling: Once cooled, carefully remove the eggs from the ice bath. Avoid dropping or banging the eggs against the sides of the bowl, which can cause cracks and make peeling even harder. Gently roll the eggs between your palms to help loosen the shell from the egg white.
The Peeling Process: There are several techniques for peeling hard-boiled eggs; find the one that works best for you. A common method involves tapping the egg gently all over its surface on a hard, flat surface (a countertop works well). Use a moderate amount of force; too little and the shell won’t crack, too much and you’ll risk breaking the egg. This creates small cracks in the shell, making it easier to peel.
Starting the Peel: Begin peeling under cold running water. The water helps to further loosen the shell and makes it easier to separate from the egg white. Start peeling at the larger end of the egg, where there’s often a small air pocket. This is usually the easiest point to begin the peeling process. Gently peel away the shell in small sections, using your fingers or a spoon to help separate the shell from the egg white. Avoid pulling or tugging at the shell, which can tear the egg white.
Troubleshooting Difficult Peels: If you encounter stubborn shells, try gently rolling the egg on the countertop again to create more cracks. You can also try adding a teaspoon of baking soda to the boiling water – this can help to loosen the shell. Avoid using excessive force, as this can damage the egg. If the egg white is sticking to the shell, it’s likely because the egg wasn’t cooled quickly enough.
Perfect Peeling Results: With practice, you’ll be able to peel hard-boiled eggs quickly and easily, resulting in perfectly smooth, intact eggs. Remember, patience is key. It’s better to take your time and peel carefully than to rush the process and end up with a damaged egg. The reward is a beautifully peeled hard-boiled egg, ready for your favorite recipe or snack.
Professional Tip: Older eggs (a few days old) are generally easier to peel than very fresh eggs. The air pocket at the larger end becomes larger with age, aiding the peeling process. Consider using slightly older eggs for optimal peeling results.
Storage: Keeping Your Perfect Eggs Perfect
Proper storage is crucial for maintaining the quality and safety of your hard-boiled eggs. Improper storage can lead to bacterial growth, resulting in spoilage and potential foodborne illness. Always refrigerate hard-boiled eggs within two hours of cooking, especially during warmer months. This significantly reduces the risk of salmonella contamination.
The best method for storing hard-boiled eggs is in an airtight container in the refrigerator. This prevents them from drying out and absorbing odors from other foods in your refrigerator. Avoid storing them in the egg carton, as the shells are porous and can allow bacteria to enter. A shallow, airtight container is ideal, allowing for even cooling and minimizing the chance of cracking.
For optimal freshness, store your hard-boiled eggs separated from each other. This prevents them from cracking and allows for better air circulation. You can achieve this by lining the container with a paper towel to absorb excess moisture and then placing the eggs individually, or separating them with small pieces of parchment paper. This helps to minimize the spread of any potential surface bacteria.
Hard-boiled eggs generally last for one week in the refrigerator when stored properly. However, it’s essential to visually inspect them before consumption. Discard any eggs exhibiting cracks, a foul odor, or a slimy texture. These are all signs of spoilage and consuming them could lead to illness. Remember, even if an egg looks and smells fine, if it’s been in the refrigerator for more than a week, it’s best to err on the side of caution and discard it.
If you need to store hard-boiled eggs for longer than a week, consider freezing them. Freezing hard-boiled eggs is a viable option for extending their shelf life to up to 3 months. To freeze them effectively, shell the eggs and place them in a freezer-safe container or bag. You can freeze them whole or sliced, depending on your intended use. Remember to label the container with the date of freezing for easy tracking.
When thawing frozen hard-boiled eggs, ensure they are completely thawed in the refrigerator before consumption. Avoid thawing them at room temperature to prevent bacterial growth. Once thawed, they should be used within 24 hours. The texture of frozen and thawed eggs may be slightly different from freshly boiled eggs, but they will still be safe to eat if handled properly.
Finally, remember that proper sanitation is key. Always wash your hands thoroughly before and after handling hard-boiled eggs. This simple step significantly reduces the risk of cross-contamination and ensures food safety.
By following these storage recommendations, you can enjoy your perfectly cooked hard-boiled eggs for longer while ensuring their safety and quality.
Perfect Hard Boiled Eggs: Recommendations
Achieving the perfect hard-boiled egg—with a firm, yet tender yolk and easily peelable shell—requires attention to detail. Once you’ve mastered the cooking process, maximizing enjoyment and convenience relies on proper handling and creative serving. Start by gently refrigerating your perfectly cooked eggs within an hour of boiling to maintain freshness and quality. Store them in their shells in the refrigerator for up to one week. For longer storage, peel and store them in an airtight container with a damp paper towel, extending their shelf life to about three days.
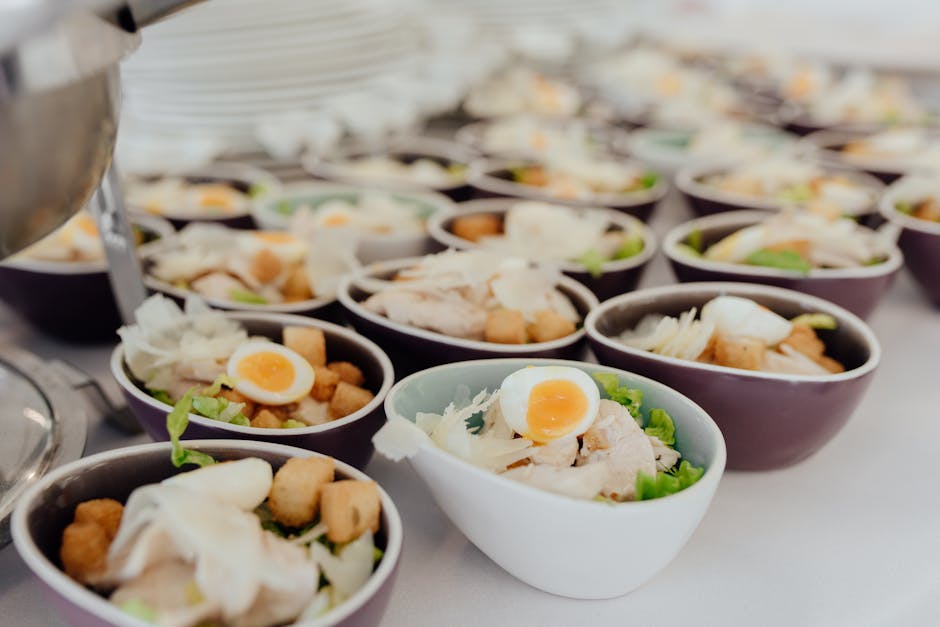
Serving Suggestions: The versatility of a hard-boiled egg is unparalleled. They’re a fantastic standalone snack, providing a satisfying protein boost. Slice them in half and sprinkle with salt and pepper for a simple yet delicious treat. Dice them and add them to salads for extra protein and texture. They’re also a wonderful addition to sandwiches, creating a creamy, flavorful filling. Consider using them as a topping for avocado toast or grain bowls for added richness.
Complementary Dishes: Hard-boiled eggs pair beautifully with a wide variety of flavors and textures. They complement the creamy richness of avocado in salads or on toast. The mild flavor enhances the sharpness of vinaigrettes and the earthiness of root vegetables. They work wonderfully in deviled eggs, a classic appetizer that can be elevated with various spices and toppings. Consider adding them to potato salads, pasta salads, or even breakfast burritos for a protein punch. The possibilities are truly endless!
Nutritional Information (per large egg, approximately): Calories: 78; Protein: 6 grams; Fat: 5 grams (including about 1.6 grams of saturated fat); Cholesterol: 186 milligrams; Carbohydrates: 1 gram. Please note that nutritional information can vary slightly depending on the size and source of the eggs.
Important Considerations for Optimal Enjoyment: To prevent cracking during boiling, start with room temperature eggs and gently lower them into simmering water. For easy peeling, immediately transfer the cooked eggs to an ice bath after boiling. This temperature shock helps to separate the egg white from the shell. Avoid overcooking, as this will result in a dry, rubbery yolk. The ideal cooking time depends on the size of the egg and your preference for yolk consistency, but generally, 6-8 minutes for a perfectly hard-boiled egg is a good starting point.
Beyond the Basics: Experiment with flavors! Add a pinch of turmeric or paprika to the boiling water for a subtly colored and flavored egg. Marinate peeled eggs in your favorite sauces or spices for an extra layer of taste. Hard-boiled eggs are a blank canvas for culinary creativity. Enjoy the convenience and nutritional value of this versatile food!


