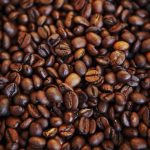
Indulge in the comforting warmth of our homemade dairy-free hot chocolate, a delicious beverage with roots stretching far back in history. While the precise origins are debated, the consumption of a cocoa-based drink dates back centuries to the ancient Olmec civilization in Mesoamerica (around 1900-1150 BC). They created a bitter concoction from cacao beans, a far cry from the sweet treat we enjoy today. The Olmecs didn’t add sugar; their drink was often spiced with chili peppers and other ingredients, reflecting the flavors of their region. The Maya and Aztec civilizations further developed the process, adding spices and sometimes even cornmeal to create a frothy, ceremonial drink known as xocolatl. It held significant cultural importance, used in religious ceremonies, and even served as a form of currency.
The arrival of cocoa in Europe during the 16th century marked a dramatic shift. Spanish conquistadors brought back cacao beans, and the drink quickly gained popularity among the European elite. However, the original recipe was significantly altered. Sugar, a relatively new and expensive commodity at the time, became a key ingredient, transforming xocolatl from a bitter beverage into the sweeter drink we recognize today. The addition of milk, initially goat’s milk and later cow’s milk, further softened the flavor, making it more palatable to a wider audience. The popularity exploded, with chocolate houses springing up across Europe, becoming social hubs for the wealthy and influential.
Today, hot chocolate remains a beloved beverage worldwide, enjoyed in countless variations. Interestingly, global hot chocolate consumption is estimated to be in the billions of servings annually, highlighting its enduring appeal. However, with growing awareness of dairy allergies and intolerances – affecting an estimated 65 million Americans alone – the demand for dairy-free alternatives has surged. This recipe addresses that demand, providing a rich and creamy hot chocolate experience without compromising on flavor or texture. We utilize high-quality dairy-free milk alternatives and carefully selected cocoa powder to create a truly decadent and satisfying drink that caters to a broader range of dietary needs and preferences, ensuring everyone can enjoy the comforting warmth of a delicious cup.
Ingredients and Measurements
Creating a truly decadent and satisfying dairy-free hot chocolate requires careful attention to the ingredients and their proportions. This recipe uses readily available ingredients, but the quality will significantly impact the final taste. Opt for high-quality cocoa powder for the richest flavor. Don’t be tempted to skimp here; it’s the heart of your hot chocolate!
We’ll be using unsweetened cocoa powder, as this gives you the most control over the sweetness level. Using sweetened cocoa powder will result in a much sweeter drink, possibly requiring less added sugar, which could impact the overall balance of flavors. For this recipe, we will use 1/4 cup (28 grams) of unsweetened cocoa powder. This amount provides a deep chocolate flavor without being overwhelmingly bitter.
The liquid base is crucial. While water works in a pinch, we strongly recommend using a combination of milk alternative and water for a richer, creamier texture. This recipe calls for 1 cup (240ml) of your favorite dairy-free milk (almond, soy, oat, or cashew all work well). Choose a brand you enjoy; the flavor of the milk will subtly influence the final product. We’ll also add 1/2 cup (120ml) of water to adjust the consistency and prevent the hot chocolate from being too thick or too thin.
Sweetness is a matter of personal preference. Start with 2 tablespoons (25 grams) of granulated sugar or your preferred sweetener (maple syrup, agave nectar, or coconut sugar are all viable options). Taste the hot chocolate before adding more; you can always add more sweetener, but you can’t take it away! Remember that different sweeteners have varying levels of sweetness, so adjust accordingly.
For added depth and complexity, we’ll incorporate a pinch of salt. A pinch of salt (about 1/4 teaspoon) enhances the chocolate flavor and balances the sweetness. Don’t underestimate the power of this seemingly insignificant ingredient! It’s a common technique used by professional chocolatiers.
Finally, optional additions can elevate your hot chocolate to the next level. Consider adding 1 teaspoon of vanilla extract for a warm, comforting aroma and flavor. A dash of cinnamon (1/4 teaspoon) adds a festive spice note, while a pinch of cayenne pepper (a tiny pinch!) provides a subtle kick for those who enjoy a hint of heat. Remember to add these optional ingredients gradually, tasting as you go, to achieve your desired flavor profile.
Summary of Ingredients and Measurements:
- 1/4 cup (28 grams) Unsweetened Cocoa Powder
- 1 cup (240ml) Dairy-Free Milk (Almond, Soy, Oat, or Cashew)
- 1/2 cup (120ml) Water
- 2 tablespoons (25 grams) Granulated Sugar (or preferred sweetener)
- 1/4 teaspoon Salt
- 1 teaspoon Vanilla Extract (optional)
- 1/4 teaspoon Cinnamon (optional)
- Pinch of Cayenne Pepper (optional)
Equipment List
Making delicious dairy-free hot chocolate at home requires the right tools to ensure a smooth and enjoyable process. While you might already have many of these items in your kitchen, having the right equipment will significantly improve your results. This list details the necessary equipment, along with recommendations and alternatives where applicable.
1. Saucepan (2-quart capacity): A medium-sized saucepan is crucial for heating the liquid base of your hot chocolate. A 2-quart capacity is ideal as it allows for sufficient space to prevent boiling over while stirring. Avoid using non-stick pans for heating dairy-free milks as some coatings can be damaged by high heat. Opt for stainless steel or enamel-coated pans for durability and even heat distribution.
2. Whisk (Balloon whisk preferred): A whisk is essential for effectively incorporating the cocoa powder and sweetener into the heated milk, preventing lumps and ensuring a smooth, creamy texture. A balloon whisk, with its larger surface area, is particularly effective in achieving this, minimizing the need for excessive stirring. However, a standard whisk will also work, though it may require more effort.
3. Measuring Cups and Spoons: Accurate measurements are key to achieving the desired taste and consistency in your hot chocolate. Having a set of measuring cups (liquid and dry) and spoons will guarantee consistent results from batch to batch. Invest in a good quality set for accurate measurements, especially for smaller quantities of ingredients like spices or extracts.
4. Spatula or Spoon (Heat-resistant): A heat-resistant spatula or spoon is helpful for scraping down the sides of the saucepan and ensuring all ingredients are fully combined. Silicone spatulas are excellent choices as they are heat-resistant, flexible, and won’t scratch your cookware.
5. Fine-Mesh Sieve (Optional but Recommended): While not strictly necessary, a fine-mesh sieve can significantly improve the texture of your hot chocolate. Sieving the cocoa powder before adding it to the milk helps to prevent lumps and ensures a smoother, silkier final product. This step is particularly beneficial when using unsweetened cocoa powder which tends to be more prone to clumping.
6. Mug or Serving Cup: Once your dairy-free hot chocolate is prepared, you’ll need a mug or serving cup to enjoy it in. Choose your favorite mug, the size depending on your preference. Consider using pre-warmed mugs to keep your hot chocolate warmer for longer.
7. Small Bowl (Optional): A small bowl can be useful for whisking together dry ingredients separately before adding them to the hot milk, further reducing the risk of lumps. This is particularly helpful if you are adding spices or other flavorings to your hot chocolate.
8. Thermometer (Optional): A candy thermometer or instant-read thermometer is beneficial for precise temperature control, especially if you’re experimenting with different dairy-free milks and want to ensure you don’t overheat or scorch them. Overheating can affect the taste and texture of your final product.
Instructions
This recipe yields approximately two servings of rich and decadent dairy-free hot chocolate. Begin by gathering all your ingredients and ensuring they are at room temperature, except for the dairy-free milk, which should be chilled. This will help ensure even heating and prevent scorching.
Step 1: Preparing the Cocoa Base: In a medium-sized saucepan, whisk together 2 tablespoons of unsweetened cocoa powder and 2 tablespoons of granulated sugar. Ensure there are no lumps; a thorough whisking is crucial for a smooth, lump-free hot chocolate. This initial mixing helps to prevent clumps from forming later when we add the liquid.
Step 2: Adding the Liquid: Gradually whisk in 1 cup of your preferred dairy-free milk (almond, soy, oat, or coconut milk all work well). Start with a small amount, continuously whisking to create a smooth paste before adding more milk. This slow incorporation prevents lumps and ensures a consistent texture. Avoid adding all the milk at once, as this can result in a clumpy mixture.
Step 3: Heating Gently: Place the saucepan over medium-low heat. Do not use high heat, as this will scorch the cocoa and result in a bitter taste. Continue to whisk gently and constantly as the mixture heats. The goal is to heat the hot chocolate gradually and evenly, bringing it to a simmer without boiling.
Step 4: Achieving the Desired Consistency: As the hot chocolate heats, the mixture will thicken slightly. Continue whisking until it reaches your desired consistency. If you prefer a thinner hot chocolate, add a little more dairy-free milk. If you prefer a thicker, richer hot chocolate, simply reduce the amount of milk initially or let it simmer for a slightly longer period. Remember to continue whisking to prevent sticking or burning.
Step 5: Flavor Enhancements (Optional): Once heated through, remove the saucepan from the heat. For an extra touch of flavor, stir in 1 teaspoon of vanilla extract. You can also add a pinch of salt to enhance the sweetness. Other optional additions include a dash of cinnamon, a pinch of cayenne pepper for a spicy kick, or a teaspoon of maple syrup or agave nectar for extra sweetness, depending on your preference. Add these ingredients gradually and taste as you go to achieve your desired flavor profile.
Step 6: Serving: Pour the hot chocolate into your favorite mugs. Garnish as desired with dairy-free whipped cream, marshmallows, chocolate shavings, or a sprinkle of cocoa powder. Serve immediately to enjoy the hot chocolate at its best temperature and texture.
Important Note: Different dairy-free milks have varying levels of sweetness and thickness. Adjust the amount of sugar and milk according to your preference and the type of dairy-free milk used. Always supervise children while using the stovetop.
Dairy-Free Milk Options & Substitutions
Creating a delicious dairy-free hot chocolate hinges on choosing the right milk alternative. The options are plentiful, each offering a unique flavor profile and texture that will impact the final product. Selecting the best substitute depends on your dietary needs and preferences, as well as the desired consistency of your hot chocolate.
Soy Milk: A popular and widely available choice, soy milk offers a relatively neutral flavor that won’t overpower the chocolate. It froths well, making it ideal for those who enjoy a creamy, textured hot chocolate. Use 1 cup of unsweetened soy milk per serving for optimal results. Note: Some individuals may have soy allergies, so be mindful of this when selecting your milk.
Oat Milk: Oat milk has gained significant popularity due to its creamy texture and naturally sweet flavor. Its slightly thicker consistency lends itself beautifully to hot chocolate, creating a rich and satisfying beverage. Use 1 cup of unsweetened oat milk per serving. Consider: The sweetness level of different oat milk brands varies, so adjust the amount of added sugar accordingly.
Almond Milk: A lighter option compared to soy or oat milk, almond milk provides a subtly nutty flavor that complements the chocolate well. However, it can be thinner than other alternatives, potentially resulting in a less creamy hot chocolate. To counteract this, you can use 1 cup of unsweetened almond milk and add 1-2 tablespoons of full-fat coconut milk for added creaminess. Tip: Unsweetened almond milk is recommended to avoid overpowering the chocolate’s sweetness.
Coconut Milk (Full-Fat): For a truly decadent and intensely creamy hot chocolate, full-fat coconut milk is unmatched. Its rich flavor adds a unique tropical twist, though it might not be suitable for those who prefer a more traditional taste. Use approximately ¾ cup of full-fat coconut milk per serving, as it’s naturally quite thick. Caution: Using too much coconut milk can lead to an overpowering coconut flavor, so start with a smaller amount and adjust to your preference.
Other Options: Many other dairy-free milk alternatives exist, including cashew milk, rice milk, and pea milk. Experiment to find your favorite! The principles remain the same: use unsweetened varieties for better control over sweetness and adjust the quantity based on the milk’s thickness. Generally, 1 cup of milk per serving is a good starting point.
Professional Recommendation: Before making your hot chocolate, ensure your chosen dairy-free milk is well-chilled. This will help it froth better if you’re using a milk frother and will contribute to a more refreshing and enjoyable beverage. Always taste-test and adjust the sweetness and milk quantity according to your preference.
Important Note: The success of your dairy-free hot chocolate depends not only on the milk choice but also on the quality of the chocolate used. Opt for high-quality dark chocolate or cocoa powder for the best flavor and richness.
Flavor Variations and Add-ins
The beauty of homemade dairy-free hot chocolate lies in its versatility. Beyond the basic recipe, a world of flavor awaits, allowing you to customize your drink to perfectly suit your palate. Experimenting with different add-ins and flavor variations is highly encouraged!
Spice it up: For a warming and comforting twist, incorporate spices. A classic combination is 1/2 teaspoon of cinnamon and a pinch of nutmeg per cup. For a more intense flavor, try adding 1/4 teaspoon of cardamom or a dash of cayenne pepper for a subtle kick. Remember to add spices towards the end of the heating process to prevent them from becoming bitter.
Chocolate Intensification: Want a richer, more intense chocolate flavor? Consider using a higher percentage cocoa powder (70% or higher) or adding a tablespoon of unsweetened cocoa paste per cup. Alternatively, melt a small square (approximately 1 ounce) of high-quality dark chocolate along with your dairy-free milk. Be mindful of the sweetness level; you may need to adjust the amount of sweetener accordingly.
Fruity Delights: Infuse your hot chocolate with the vibrant flavors of fruit. A simple addition is a teaspoon of vanilla extract, or you can blend in a small amount (about 1/4 cup) of pureed fruit like raspberries, strawberries, or bananas. For a more sophisticated approach, try adding a splash of fruit liqueur like raspberry or orange liqueur (1-2 teaspoons, adjust to taste). When using fruit purees, strain them first to avoid a grainy texture.
Nutty Indulgence: Enhance the richness and texture of your hot chocolate with nuts. A spoonful of nut butter (almond, hazelnut, or cashew) stirred in adds creaminess and a delightful nutty flavor. Alternatively, for a crunchy topping, sprinkle chopped nuts like pecans, almonds, or hazelnuts on top. For a smoother texture, consider warming the nut butter slightly before adding it to the hot chocolate.
Boozy Bliss (for adults only): Elevate your hot chocolate experience with a touch of alcohol. A shot (1.5 ounces) of espresso or coffee liqueur adds a robust coffee flavor, while a splash (1-2 teaspoons) of peppermint schnapps creates a festive peppermint hot chocolate. Always drink responsibly and be aware of the alcohol content.
Extra Creamy Texture: To achieve an extra creamy texture, incorporate a tablespoon of full-fat coconut cream or a dairy-free creamer. Alternatively, blend a small amount of your chosen dairy-free milk with a few tablespoons of oats before adding it to the hot chocolate for a naturally thicker consistency. Experiment with different dairy-free milk options to find your preferred creaminess level.
Sweetener Adjustments: Adjust the sweetness level to your preference. Use maple syrup, agave nectar, or your preferred sweetener. Start with the amount specified in the basic recipe and add more gradually until you reach your desired sweetness. Remember that different sweeteners have varying levels of sweetness, so adjust accordingly.
Garnish and Presentation: Don’t underestimate the power of presentation! Top your hot chocolate with whipped coconut cream, marshmallows (dairy-free, of course!), a dusting of cocoa powder, or a sprinkle of your favorite spices. A beautiful mug can also enhance the overall experience. Get creative and have fun with it!
Storage Instructions
Proper storage is crucial for maintaining the delicious flavor and quality of your homemade dairy-free hot chocolate. Following these instructions will help ensure your delightful beverage remains enjoyable for as long as possible.
For optimal freshness, consume your homemade dairy-free hot chocolate within 3-5 days of preparation. This timeframe allows you to enjoy the vibrant flavors and creamy texture at their peak. Beyond this period, the quality of the ingredients may begin to degrade, impacting the overall taste and potentially leading to spoilage.
Refrigeration is key. Store your hot chocolate mixture in an airtight container. This prevents the entry of air, which can lead to oxidation and affect the taste and aroma. A well-sealed container also minimizes the risk of contamination from other foods in your refrigerator.
We recommend using a glass or food-grade plastic container with a tight-fitting lid. Avoid using metal containers, as they can react with some of the ingredients, potentially altering the flavor or color of your hot chocolate. A 1-quart (approximately 1-liter) container is suitable for a typical batch recipe, but adjust the container size according to the quantity you have prepared.
Proper labeling is essential. Clearly label your container with the date of preparation. This helps you track the age of your hot chocolate and ensures you consume it within the recommended timeframe. You can also add a brief description of the contents, such as Dairy-Free Hot Chocolate – Vanilla Bean. This makes identification simple and avoids confusion.
Freezing your hot chocolate is possible, but with caveats. While freezing can extend the shelf life, it can slightly alter the texture upon thawing. The mixture might become slightly thinner or less creamy. If you choose to freeze your hot chocolate, use a freezer-safe container to prevent leakage. Ensure the container is filled to the brim to minimize air pockets that could affect the texture during freezing and thawing.
Thawing instructions: If freezing, thaw your hot chocolate in the refrigerator overnight. Avoid thawing at room temperature, as this can promote bacterial growth. Once thawed, gently whisk the mixture to restore a smooth consistency. Do not refreeze the hot chocolate once it has been thawed.
Important Note: Always inspect your hot chocolate before consuming it. Discard any mixture that shows signs of spoilage, such as mold growth, unusual color changes, or an off-putting odor. Food safety should always be your top priority.
By following these storage instructions diligently, you can enjoy your homemade dairy-free hot chocolate at its best for several days, or even longer if frozen correctly. Remember that freshness is paramount for a truly delightful experience.
Recommendations for Homemade Dairy-Free Hot Chocolate
This decadent dairy-free hot chocolate is perfect for a cozy night in or a special treat. To enhance your experience, we offer several recommendations for serving, storage, and pairing with complementary dishes.
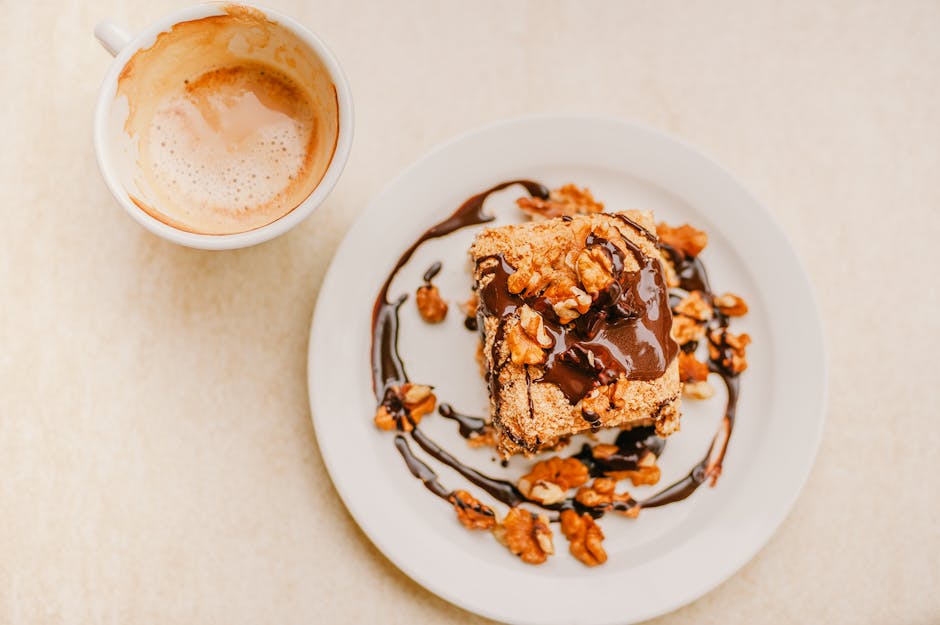
Serving Suggestions: For the ultimate indulgence, serve your homemade dairy-free hot chocolate in a warmed mug. Garnish generously! Consider adding a dollop of dairy-free whipped cream (coconut cream works wonderfully), a sprinkle of cocoa powder, a dash of cinnamon, or even a few mini marshmallows (ensure they are dairy-free). For a more sophisticated touch, consider a dusting of finely grated dark chocolate or a sprig of fresh mint. Experiment with different toppings to find your perfect combination. A small pinch of sea salt can surprisingly enhance the chocolate flavor, so don’t be afraid to try it!
Storage Conditions: For optimal freshness, store any leftover hot chocolate in an airtight container in the refrigerator for up to 3 days. Do not freeze, as this can alter the texture and flavor. When reheating, gently warm it on the stovetop or in the microwave, stirring frequently to prevent scorching. Avoid boiling, as this can cause the chocolate to separate or become grainy.
Complementary Dishes: This rich and comforting beverage pairs beautifully with a variety of desserts and snacks. Consider serving it alongside a plate of warm, gooey dairy-free brownies, a slice of dairy-free cake, or some freshly baked dairy-free cookies. For a more savory pairing, it surprisingly complements a selection of cheeses (ensure they are dairy-free!), crackers, and fruit. A light and fluffy dairy-free biscotti would also be a delicious accompaniment.
Nutritional Information (per serving, approximate values will vary based on specific ingredients used): This information is an estimate and may vary depending on the specific ingredients and quantities used. Always check the nutritional information of your individual ingredients for accurate calculations.
Calories: Approximately 200-250 calories per serving (depending on the type of dairy-free milk and added sweeteners).
Fat: Varies depending on the type of dairy-free milk and added ingredients. Coconut milk will be higher in fat than almond milk, for example.
Carbohydrates: Primarily from the sweetener used. Using less sugar will reduce the carbohydrate content.
Protein: Relatively low, unless protein powder is added.
Important Note: Always check the labels of all ingredients to ensure they are dairy-free and suitable for any dietary restrictions or allergies. Adjust sweetness to your preference. Enjoy responsibly!